
WiFi is one of those advances in technology that completely changed the way we conceive of internet connections. Thus, gradually all devices incorporated adapters for this type of network and today it is a reality not only in computers and smartphones, but also in household appliances. In this sense, we want to talk about how to activate WiFi in Windows 10, a task that can be simple, but that you have many ways to carry out.
For this reason, we are going to review all the mechanisms offered by computers with this operating system to start up the adapter, an essential step to see the available networks and connect.
4 ways to activate WiFi on a Windows 10 computer
As we mentioned before, Windows offers various alternatives to activate WiFi and knowing them all will allow us to better deal with any inconvenience. For example, in Windows 10 it is very common for the WiFi icon to disappear and this takes away the possibility of enabling it through the taskbar. Knowing the alternate routes will give us a greater margin of maneuver when it comes to having any type of failure with this component.
However, we recommend restarting your computer as a first option if you are having trouble enabling Wi-Fi or connecting to a network.. This will allow you to reload both drivers and hardware functionality, which will most likely fix the problem, unless there is a deeper problem.
Activate WiFi from the taskbar
The first, simplest and most conventional way to activate WiFi in Windows 10, it's from the icon on the taskbar. When disabled, a globe icon will be displayed instead of the classic WiFi sign.
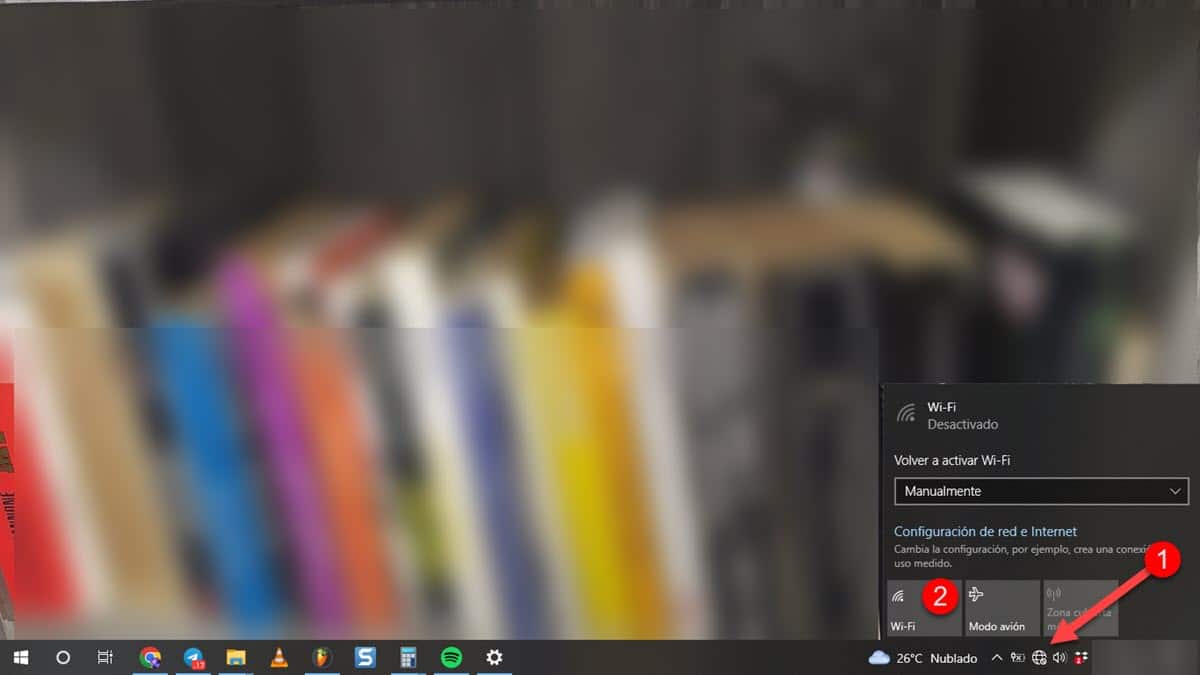
When you click it, a small box will be displayed and in its lower part you will see 3 icons, select the first one from left to right and the WiFi signal will be enabled immediately.
From Windows 10 settings
Microsoft began in Windows 10 its plans to replace the Control Panel with a new area for settings, more adapted to the current graphic line. Thus, in this version of the system we find the Configuration section from where we can modify all aspects of our Windows experience. This also includes the activation of the WiFi signal and in that sense, we are going to review how to do it.
To get started, head over to the Settings section. You can do this in two ways, from the start menu, by clicking on the gear icon on the side panel. The second and fastest way is to press the Windows+I key combination.
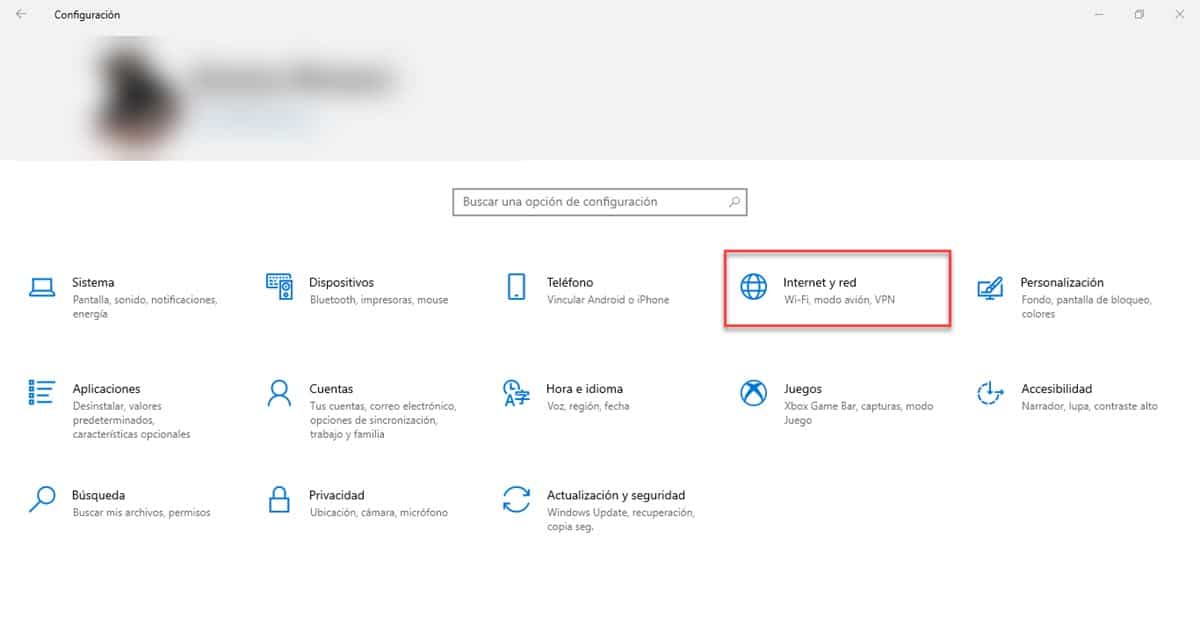
Now, go to “Internet and Network” and then to the WiFi option on the left side panel. Immediately, you will be on a screen dedicated to the connection of wireless networks and at the top you will see a switch to enable WiFi.
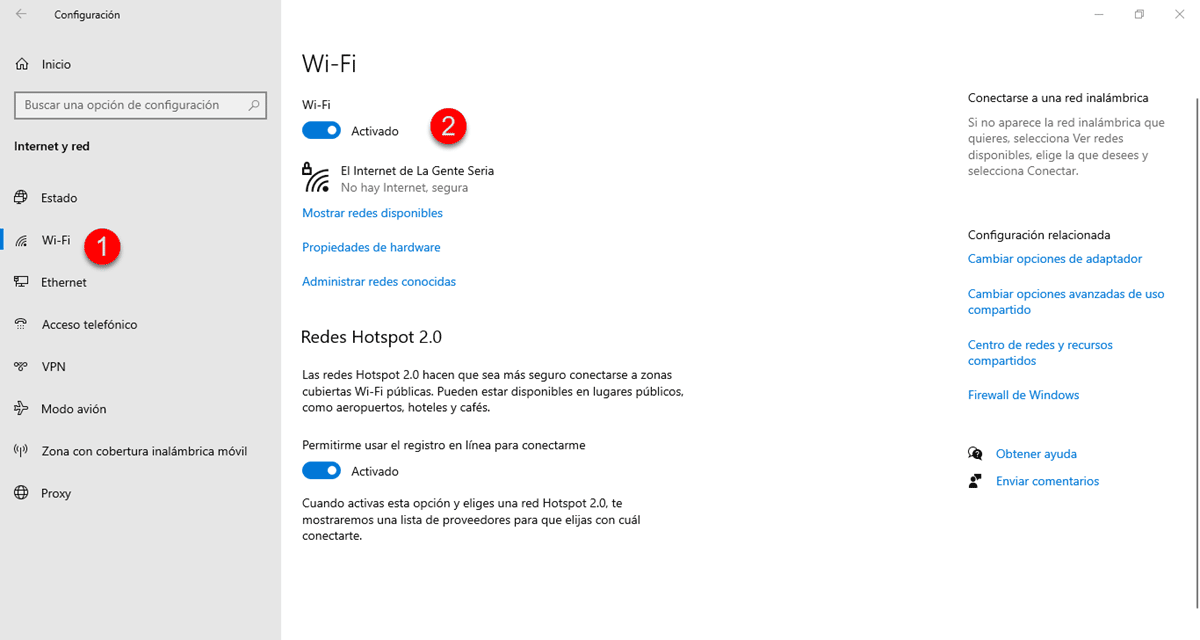
Activate it and in a matter of seconds you will be able to see the available networks and connect.
From the shell
The command interpreter or System Prompt could be defined as the back of the system, where all the threads of the actions that we carry out in the interface are moving. In that sense, if you keep wondering how to activate WiFi in Windows 10 because the previous options did not work, surely this one will give you good results..
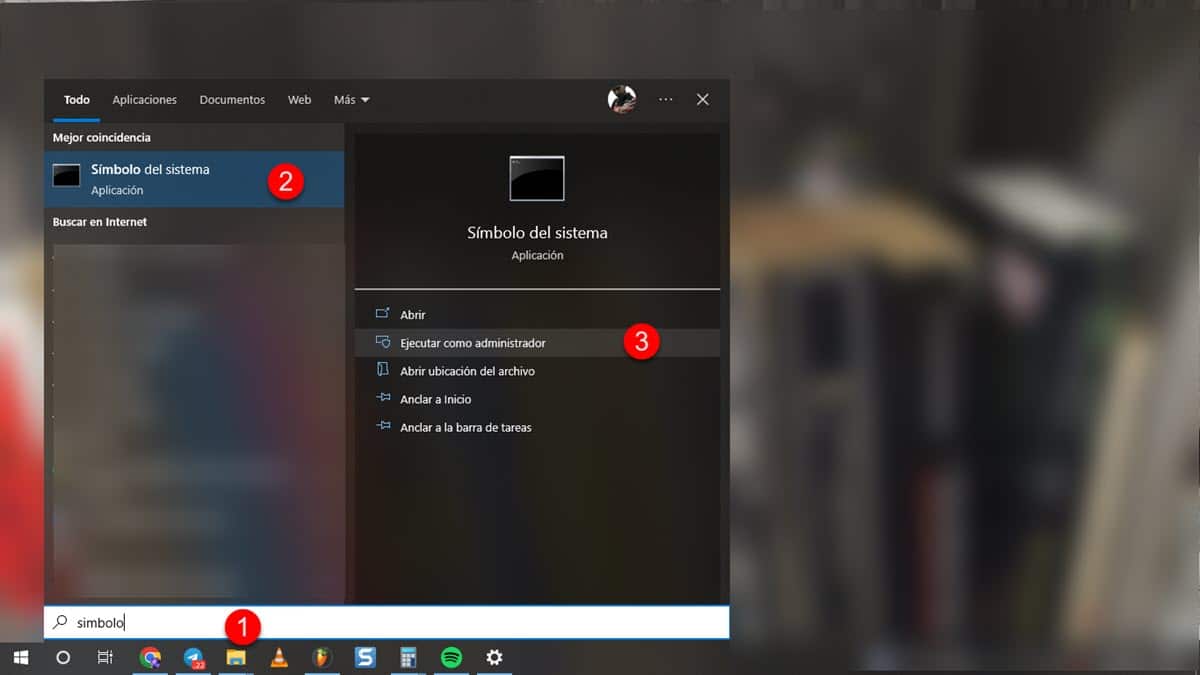
To carry out this task we will need to enter a command that will allow us to activate the WiFi directly, without having the graphical interface as an intermediary. In that sense, we will start with opening a Command Prompt with administrator privileges. You can do this by opening the start menu and typing Command Prompt, the result will appear on the right side and just below you will see the options to run it with all permissions.
Once the black window is open, insert the following command and press Enter:
netsh interface show interface
The system will respond showing all the network adapters that the computer has. The idea is to identify the name of the WiFi interface that we are occupying in order to use it in the next command. In that sense, enter the following and press Enter:
netsh interface set interface Interface_Name enabled
Where Interface_Name is nothing more than the name that we identified in the previous step and that allows us to point to our WiFi adapter. At this point, if there is no major problem with your computer's WiFi, it is already enabled.
An executable to enable WiFi
SIf you need to perform this task with some frequency and the shell-based mechanism gives you the results you expect, you can convert it to an executable. This will save you the hassle of typing commands every time you need to activate the WiFi adapter. In that sense, open a Notepad, paste the command that we used previously and save it with a .Bat extension.
Then it will only be a matter of double-clicking it when you want to activate the WiFi of your computer and that's it.