
Nowadays, work on audiovisual material is really accessible to any user who wants to do it. Previously, this was something that was reserved for professionals who also had the budget to pay for the necessary hardware and software. In that sense, if you are looking for a free way to convert, stream or edit videos, you have come to the right place because, next, we are going to talk about how to install FFMPEG on Windows.. This collection of software offers a series of tools that are not only effective, but also free and free, fundamentally oriented towards videos, which are worth learning about.
If you want to do live broadcasts or if you need to change the format of your video files frequently, this is an excellent alternative to achieve it.
What is FFMPEG?
As we mentioned before, FFMPEG is a collection of software. This means that we are talking about a package of computer programs oriented to different tasks in the audio and video area.. In that sense, knowing how to install FFMPEG on your Windows computer will give you the possibility to stream, play video, access a complete library of codecs and also deplexers and multiplexers. Additionally, it incorporates a library for video post processing and another for scaling.
In this way, we can see that it is a suite to work with audiovisual material. However, it has particular characteristics such as the fact that it is free software. This means that its use is not tied to a license, so you can download it and start using it immediately. Likewise, if you have programming knowledge, you will have the possibility to apply improvements, corrections and experiment as you wish.
On the other hand, it is worth noting that this collection of software was originally developed for Linux. However, at this time, versions have already been created for the Microsoft operating system, so if you are wondering how to install FFMPEG on Windows, we are going to explain it to you below.
Steps to install FFMPEG on Windows
Those looking for how to install FFMPEG on Windows should know that it is a fairly simple process. Incorporating the entire package will give you the possibility to access the streaming tools, conversion and everything that the collection offers. However, it is necessary to highlight a particular point of this program and it is the fact that it does not have a graphical interface. This means that all tasks must be run from the command line. Despite this, they are very simple sentences and the documentation for which is available on the official site.
Step 1: Download FFMPEG
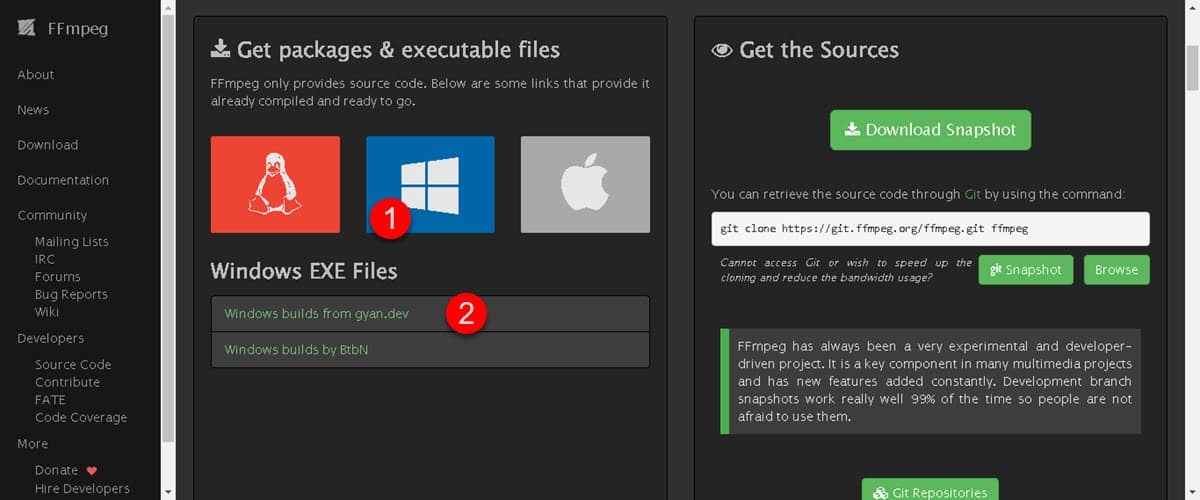
The first step of this process is to download the program and for this, you will only have to follow this link. Then scroll down a bit and click on the Windows icon to bring up the available download options. For our example, we will occupy the first link.
This will take you to a new page where you will have to scroll down a bit and you will see the Full and Essentials options. The difference between one and the other is that the first contains all the codecs and libraries, while the second has the most basic ones.
Step 2: Unzip and Install
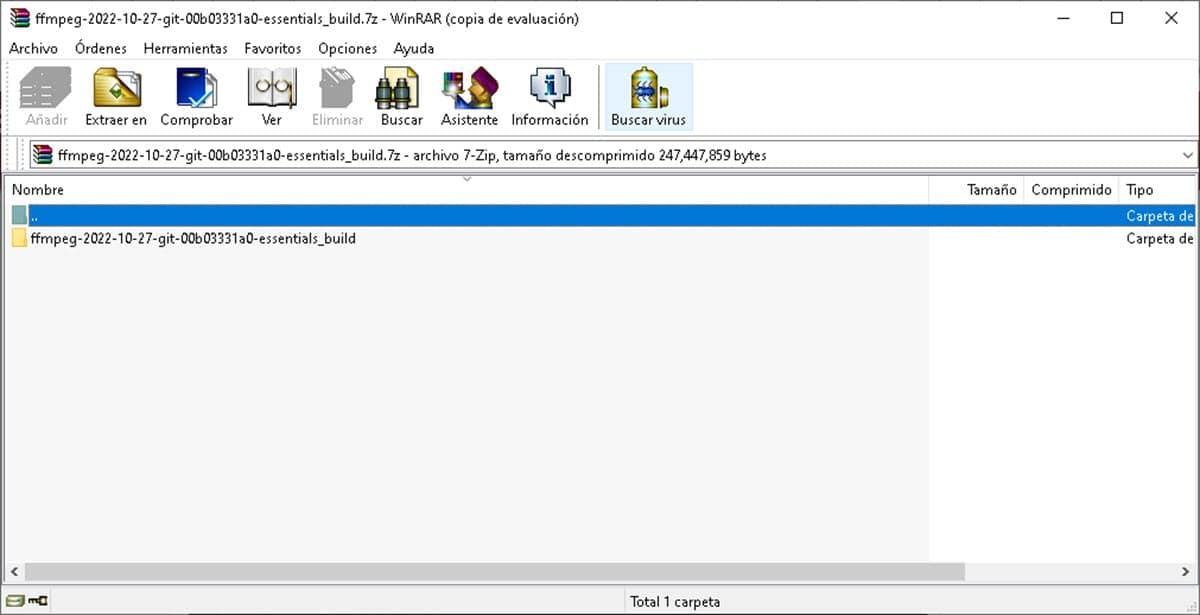
The download will give us a compressed file in 7Z format, which you can decompress with 7Zip and also with WinRar. Take the folder in question to the C:/ drive, inside you will see several directories, however, the one that interests us is Bin. Inside is the FFMPEG executable, however, as it does not have a graphical interface, nothing will happen if we double-click it.
In that sense, to run it you will have to open a Command Prompt and then enter from the command interpreter to the folder that we mentioned before. To do this, when you open the terminal, type the following command and press Enter:
CD C:\ffmpeg\bin
This will take you to the folder within the terminal. Now, we can run the FFMPEG.exe file just by typing its name and pressing Enter. Do it to start the installation and when finished, you can start using the different tools to play or stream.
Step 3: Environment Variables
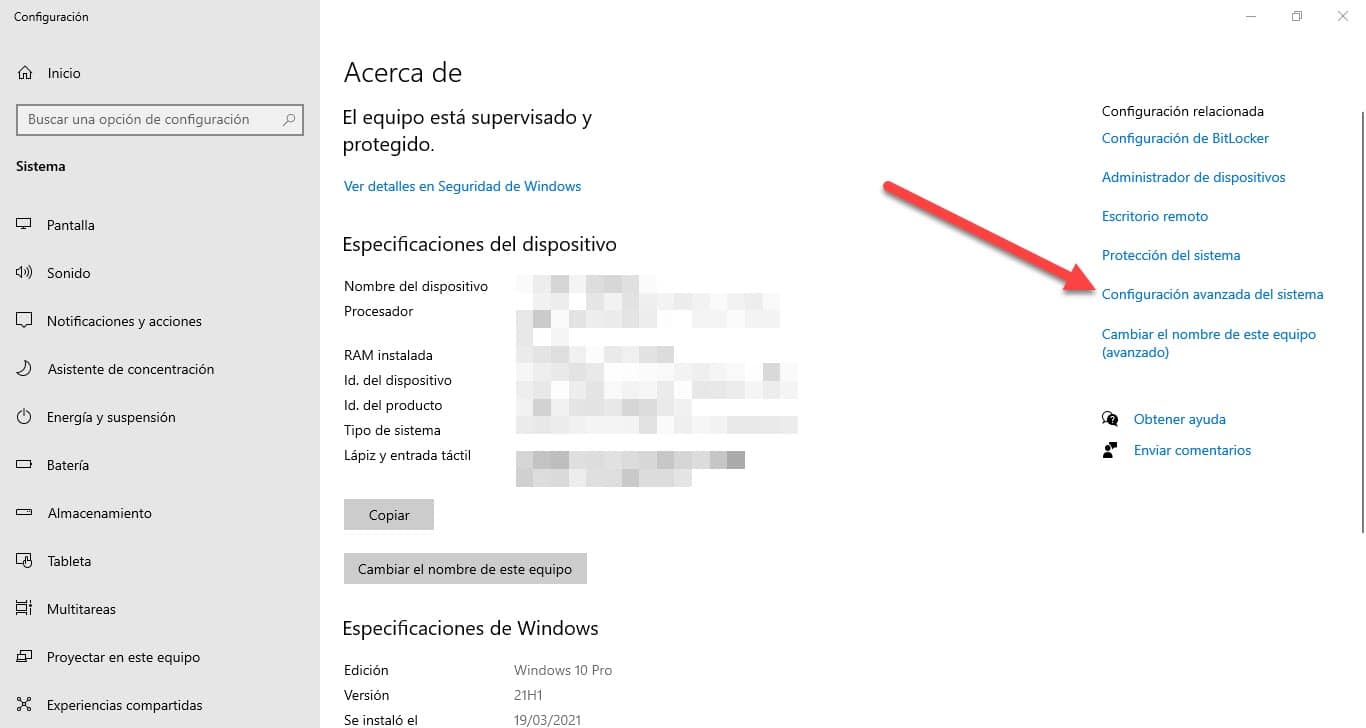
In order to facilitate its use within the Command Prompt, we recommend an additional process with which you can start executing the commands, without the need to go to the FFMPEG directory. To do this, right click on the Start Menu and then select “System”.

This will take you to a Windows Configuration window where we are interested in the link located on the right identified as “Advanced System Settings".
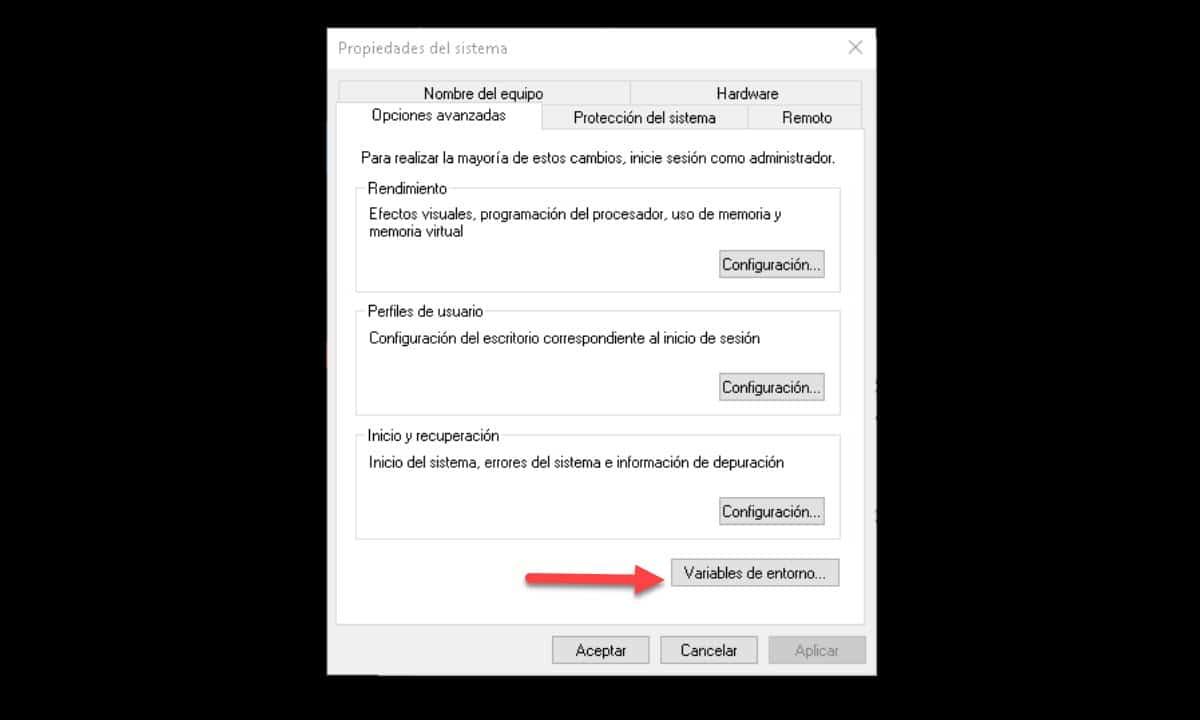
Now, a small window will be displayed with the name of “System properties”, go to the tab “Advanced Options” and at the end you will find the button “environment variables”, click it.
Immediately, a window with all user and system variables will be displayed. We will create a new user variable and to do so, click on the “New” button.
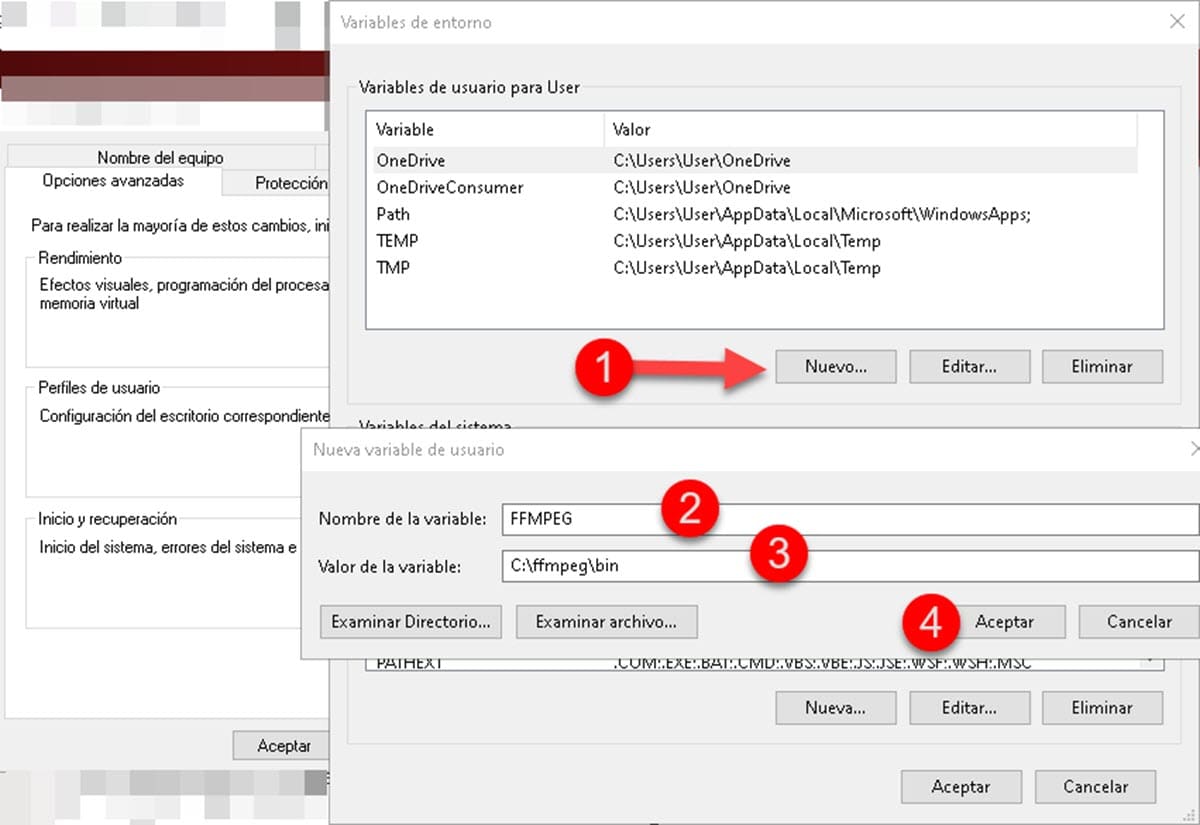
A small window will be displayed asking for a name for the variable and the value of the variable. The latter is nothing more than the path of the Bin folder, to get it, open it in Windows Explorer and copy it from the address bar.
Finally, click on the button “Accept” of all windows and voila.