
Presentations with slides have been the protagonists in exhibitions, presentations and all kinds of exhibitions where we have to touch on a topic for many years. In that sense, PowerPoint is the leading tool for these purposes, although a number of really interesting options have emerged in recent years. It is clear that the first software that we think of when creating content of this type is the Microsoft tool, however, if one day we do not have it for whatever reason we must resolve with an alternative. For this reason, today we want to teach you how to make a slide from Word, the word processor in the same package.
Maybe you didn't know that Word can save the day if we need to create a couple of slides when we don't have PowerPoint and here we are going to tell you how to do it easily.
Can Word do slideshows?
Taking the above into account, the first thing you may have wondered is if Word is really capable of making slides. The specific answer to this question is yes, and this is due to the possibility that this software has to handle title schemes and insert objects to illustrate the image. Nevertheless, If we are going to use Word for this task, we must be completely clear that we will be dealing with a word processor, so we will not have all the options of a slideshow creator.
In this way, you will not be able to count on animations or transitions when you go from one slide to another. Likewise, the task may not be as comfortable as in PowerPoint when it comes to centering the titles and adding the objects in the places you want. However, as we mentioned before, Word can save the day for creating simple slides in case we don't have PowerPoint.
Below we will tell you the steps to follow to achieve this and obtain a simple presentation, but with all the elements to complement any presentation.
How to make a slide in Word?
Having clear the limitations of the tool, how to make a slide in Word is a fairly simple process that will not generate too many complications.
Change the orientation of the document
To get started with this, open up Microsoft Word and the first thing you need to do is head over to the “Page Layout” tab.. This section has options oriented to the margins, orientation, size and other aspects of the page in which we are working.
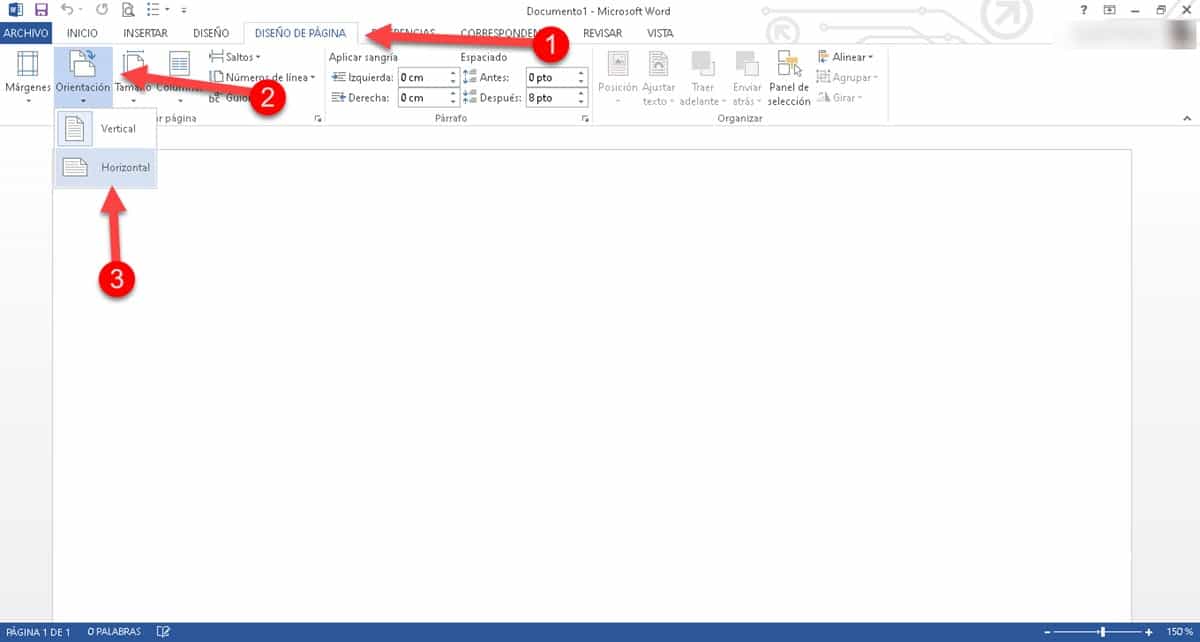
Go to "Orientation" and click on the tab that displays two options: vertical and horizontal, select the second. This is the main feature of slides in PowerPoint, so we started by adapting the environment.
slide format
Next, we will work from the "Home" tab from where you can everything related to the appearance of the slide. Here you will find headings and subheadings in different styles, text alignment, font size, and many other formatting options to make your slide look the way you have in mind.
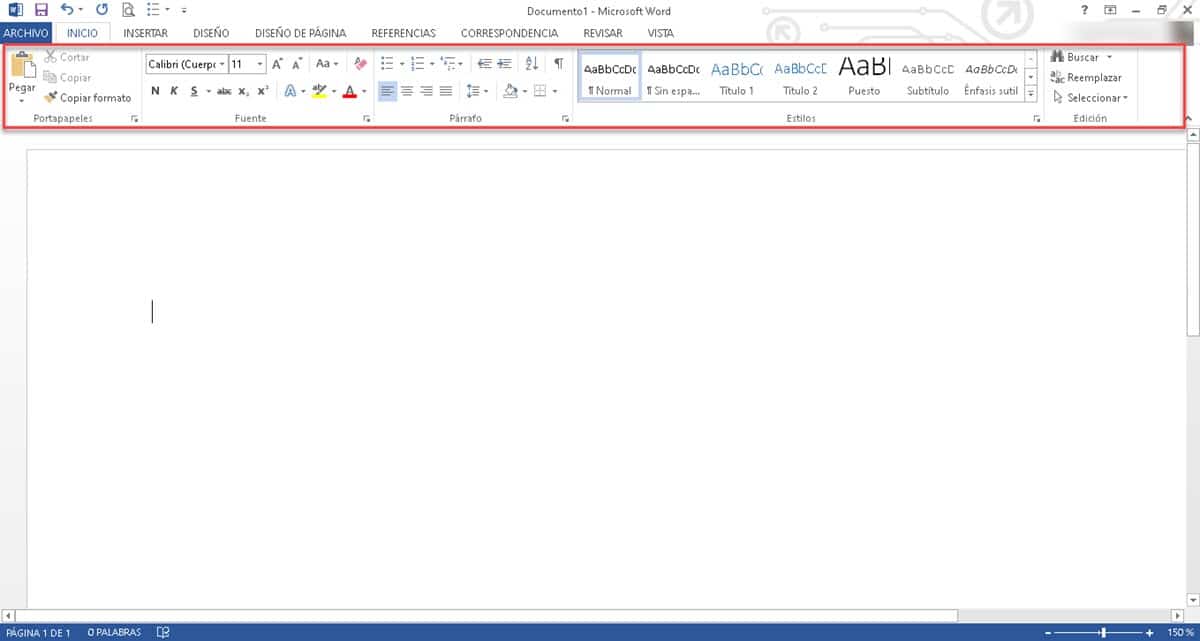
An important tip at this point is to use center alignment, as this will put all your content in the middle of the page, just like a PowerPoint slide.
insert elements
Those who are looking for how to make a slide in Word should know that in addition to adjusting the format, you can also insert elements, something very useful for this task. In that sense, Enter the "Insert" menu and you can add tables, images, graphics, shapes and even videos and Wikipedia articles.
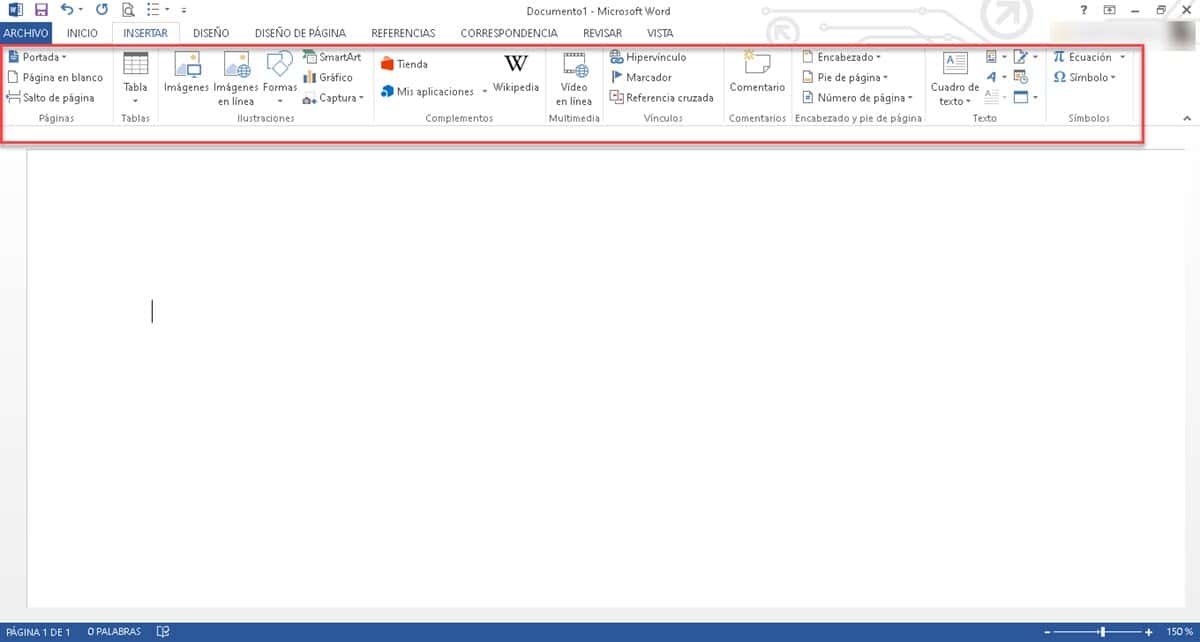
Word even offers the possibility to connect applications, so if what you have to present is subject to some additional software, you could try the integration.
see the slide
From the tabs we mentioned above, you'll have all the options Word offers for creating slides. With sufficient availability and creativity, we can obtain excellent results, even if it is a word processor. Once you have finished creating your presentation and when it is time to show it, you will have to go to another tab of the program.
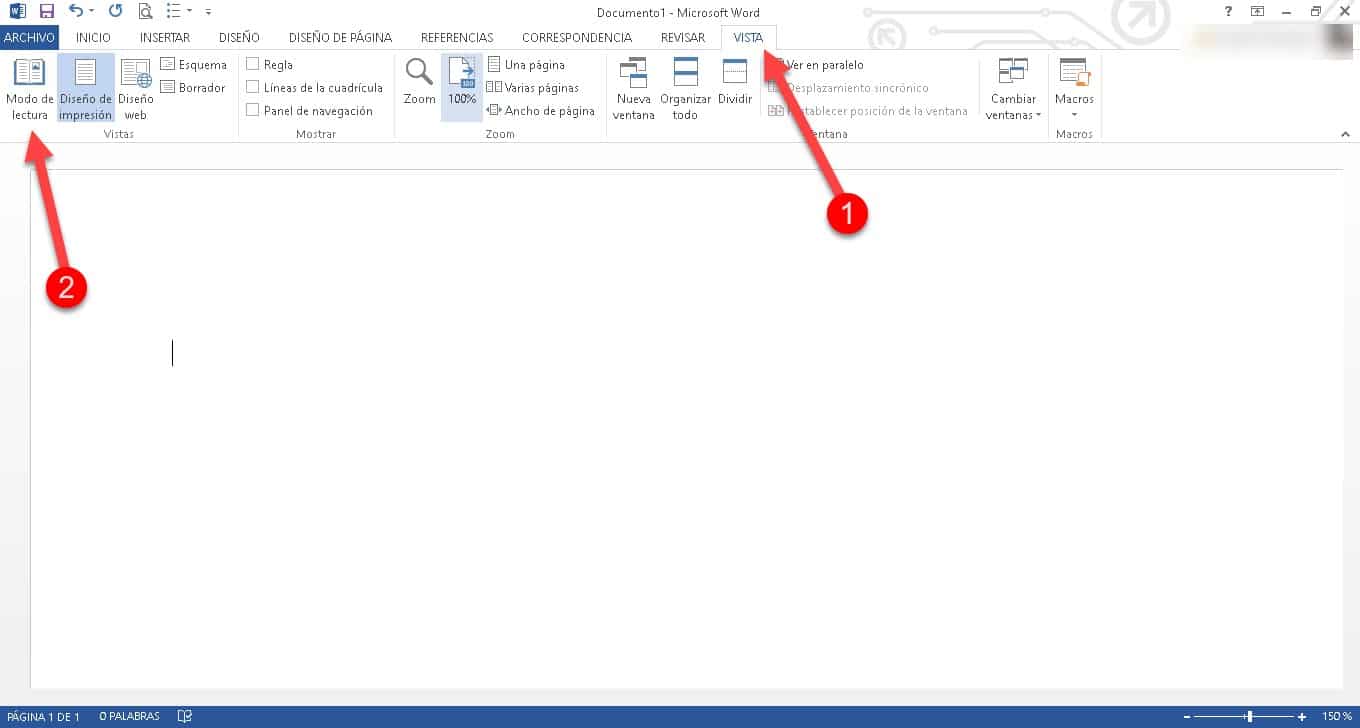
This time it is the "View" section from where we can configure how the work area is displayed. In the "Views" section, the first one that you will see from left to right, you will have the different display options available. The one that interests us for these purposes is “Reading mode”, which will remove the entire toolbar and leave only the content that we have created.
In this mode, you will see that Word shows an arrow at each end of the document, with which you can go to the next or previous slide. In this way, you will not have to despair looking for alternatives to quickly create a presentation, carry out registration processes and even payments. Word makes available a range of basic, but powerful options, to have a great result that fulfills the function we need in our exhibition.