
Until the arrival of Windows 10, Windows 7 represented the most successful and appreciated operating system from Microsoft. Although the company currently no longer provides support for this version, there are still many users with computers that incorporate it and that are functional for their activities. In that sense, we want to teach you how to reinstall Windows 7 on any computer without too many complications.
It is a fairly simple process, for which, however, you will need to be informed of certain aspects in order to achieve it successfully.
What do I need to reinstall Windows 7 on a computer?
First of all, those who are looking for how to reinstall Windows 7 should know that the only alternative is a clean install. Years ago, when Windows 10 was taking its first steps, it was possible to go through the process of going back to the old operating system if you had upgraded from Windows 7. Right now it is no longer possible, since Windows 10 has received a whole number of updates and Version changes that are no longer compatible with restore.
On the other hand, you will need to have a USB memory of at least 8GB or a DVD disc. The most recommended option is the first one, however, installing from disk can get you out of trouble if you don't have USB ports.
Additionally, you will have to do a previous search to know how to enter the BIOS of your computer so boot it from the installation media. This is usually achieved by pressing F2 or F1 on boot up, however this can vary depending on the manufacturer.
Considerations before reinstalling Windows 7
The first thing to consider is that If the computer you want to reinstall Windows 7 on has a higher operating system, your files will not be preserved. In this way, the only alternative you have is to do a clean installation, where everything will be removed.
However, if you are looking for how to reinstall Windows 7 on a computer that already has the same operating system installed, then you can keep the files and find them in the Windows.Old folder that will be created during the process.
How to reinstall Windows 7 on my computer
Step 1: Download an ISO Image
The fundamental piece for this task is an ISO image of Windows 7, however, there is an obstacle in front and it is the fact that Microsoft has withdrawn the possibility of downloading from its official site. This forces us to resort to third party websites, so we recommend paying close attention to the file you are downloading, identifying that it is in ISO format and that its weight is 3GB.
Step 2: Create Bootable USB or DVD
Once you have the ISO image of Windows 7, we must insert it on a DVD or USB and make it bootable. Burning the image to a disc is really simple, you just need to insert the blank DVD and then right click on the ISO image. Immediately, Select the “Burn Image” option and a window will be displayed where you can start recording the disc.

For its part, the option to create a bootable USB is much more reliable and faster. To do this, we must have a USB memory of at least 8GB and the Rufus application.

This utility will allow you to record ISO images of operating systems on any USB to install from there. To obtain the, follow this link y once you have it on your computer, run it and click on the “Select” option. From there you can select the Windows 7 ISO image that you downloaded earlier.

Click on start and at the end you will have your USB with the ISO image of Windows 7 ready to reinstall.
Step 3: Boot the computer from the DVD or USB stick
As we mentioned before, to carry out this step we need to do a previous search about how to enter the BIOS of the computer and that this varies according to the manufacturer. However, when inserting a bootable disc into the DVD drive, booting will generally prioritize it over the hard drive.. This means that the installation will most likely start automatically.
However, The same does not happen with USB sticks and in most cases you will have to carry out two steps:
- Enter BIOS.
- Change the boot order, with USB first.
Step 4 – Follow the steps in the wizard
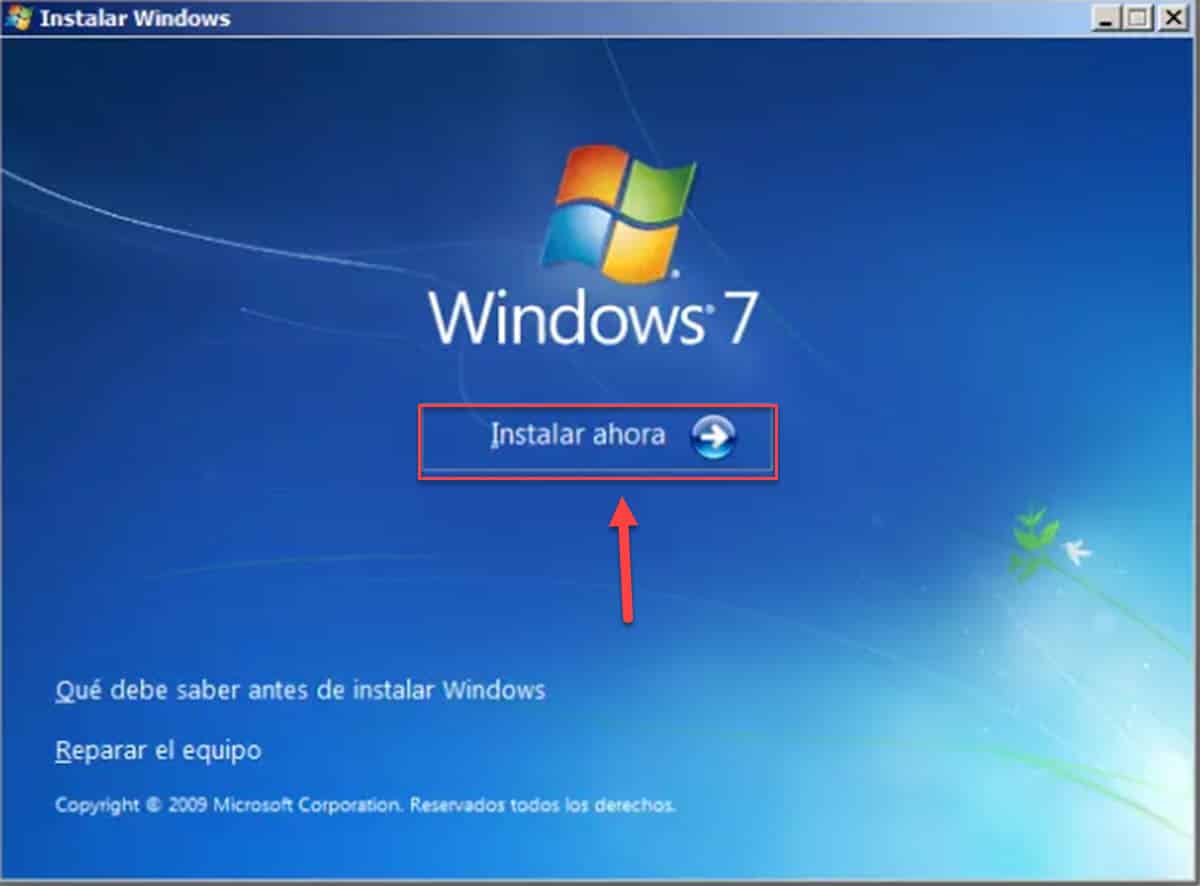
By giving USB priority at boot and rebooting, the Windows 7 installer will immediately boot prompting you to press a key to boot. Then, you will go to the welcome screen where you must click on the “Install Now” button.
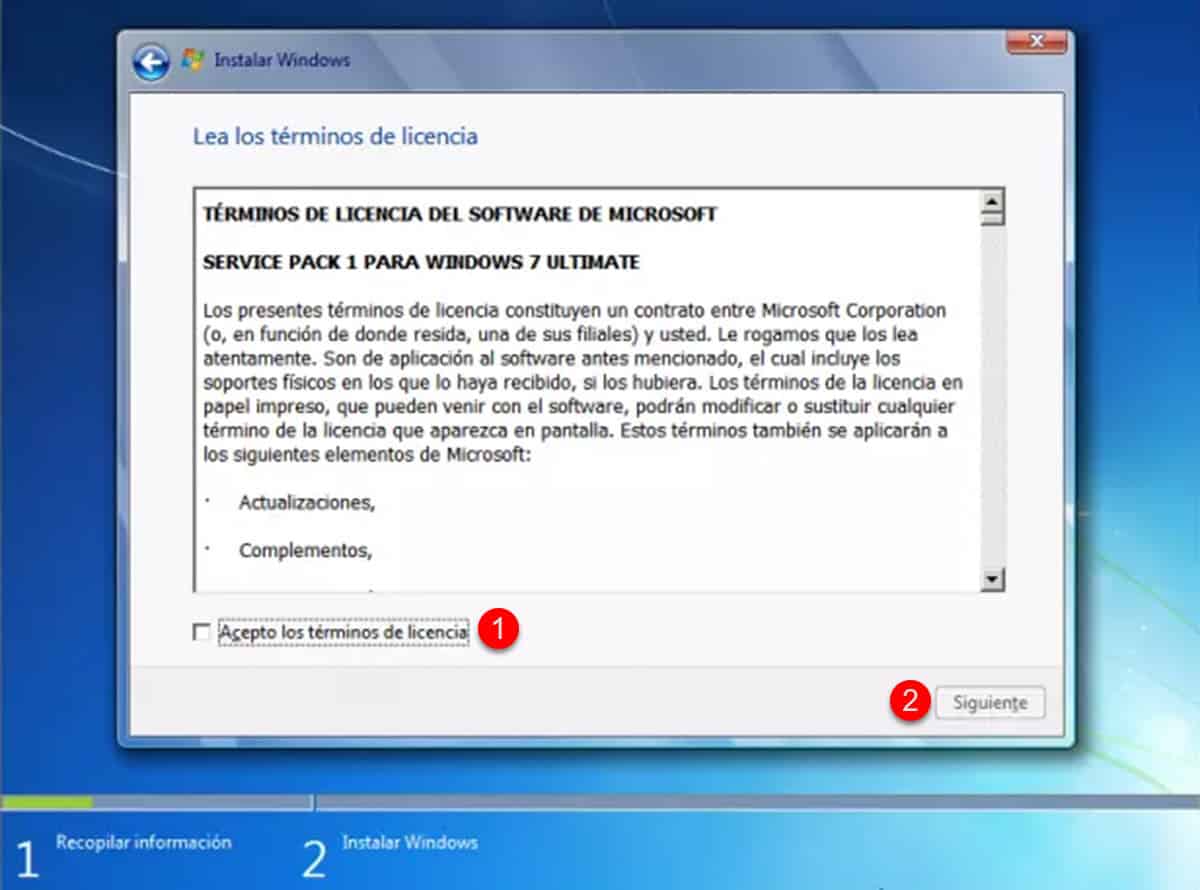
Immediately, you will be on the page of the terms and conditions. Accept them and click “Next”.
The wizard will ask if you want to do an update or a custom installation. Choose the second.
Step 5: Install Cleanly or Keep Files
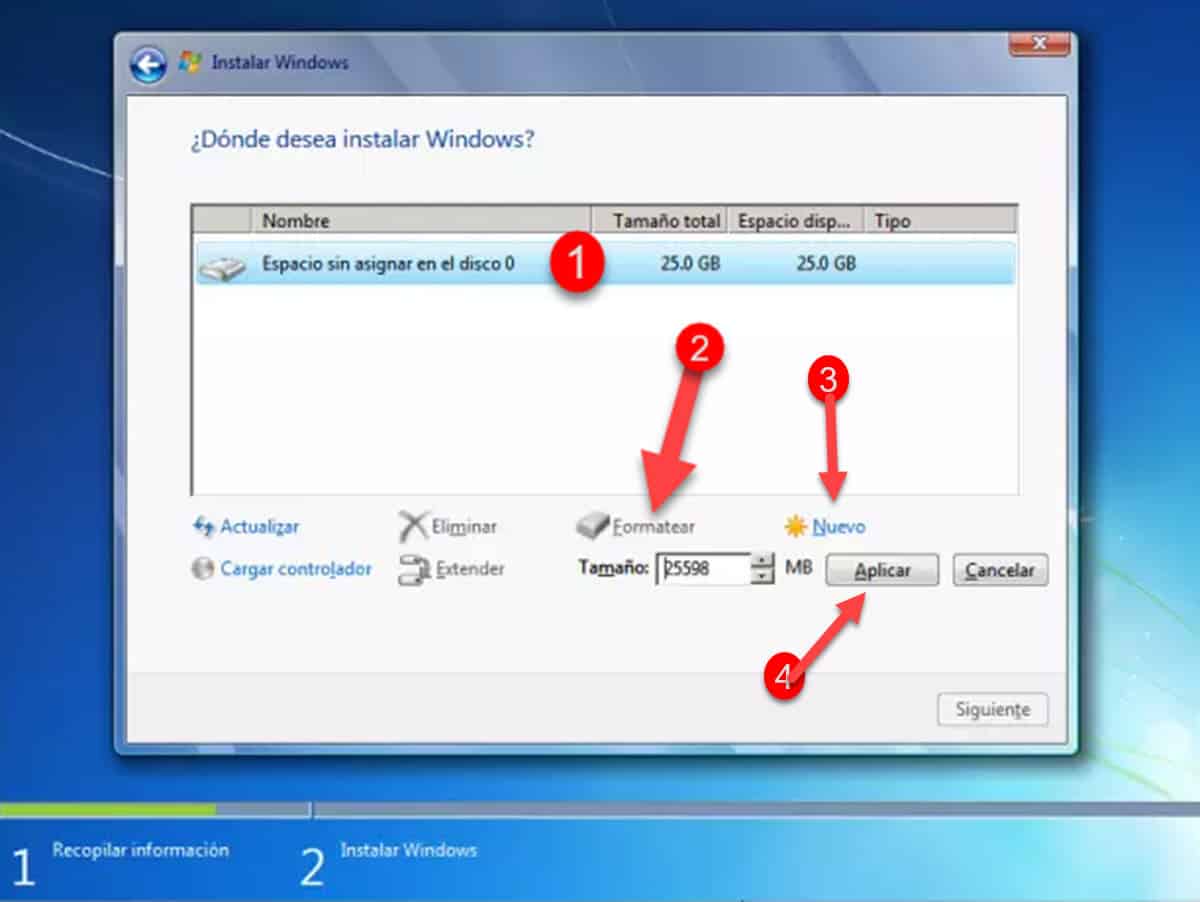
When choosing the custom installation, the system will take you to the selection of the disk where you want to incorporate Windows 7. Depending on what you do here you will either get a clean install or keep the files you had on your old install.
To do a clean install, select and remove all partitions (if any).
Then, select the hard drive and click on “Format”. Next, click on “New” and then on the “Apply” button to generate the volume where the system will be installed. Finally, click "Next" for the system to start installing.
If you want to keep your files, then select the hard drive and click "Next" right away.
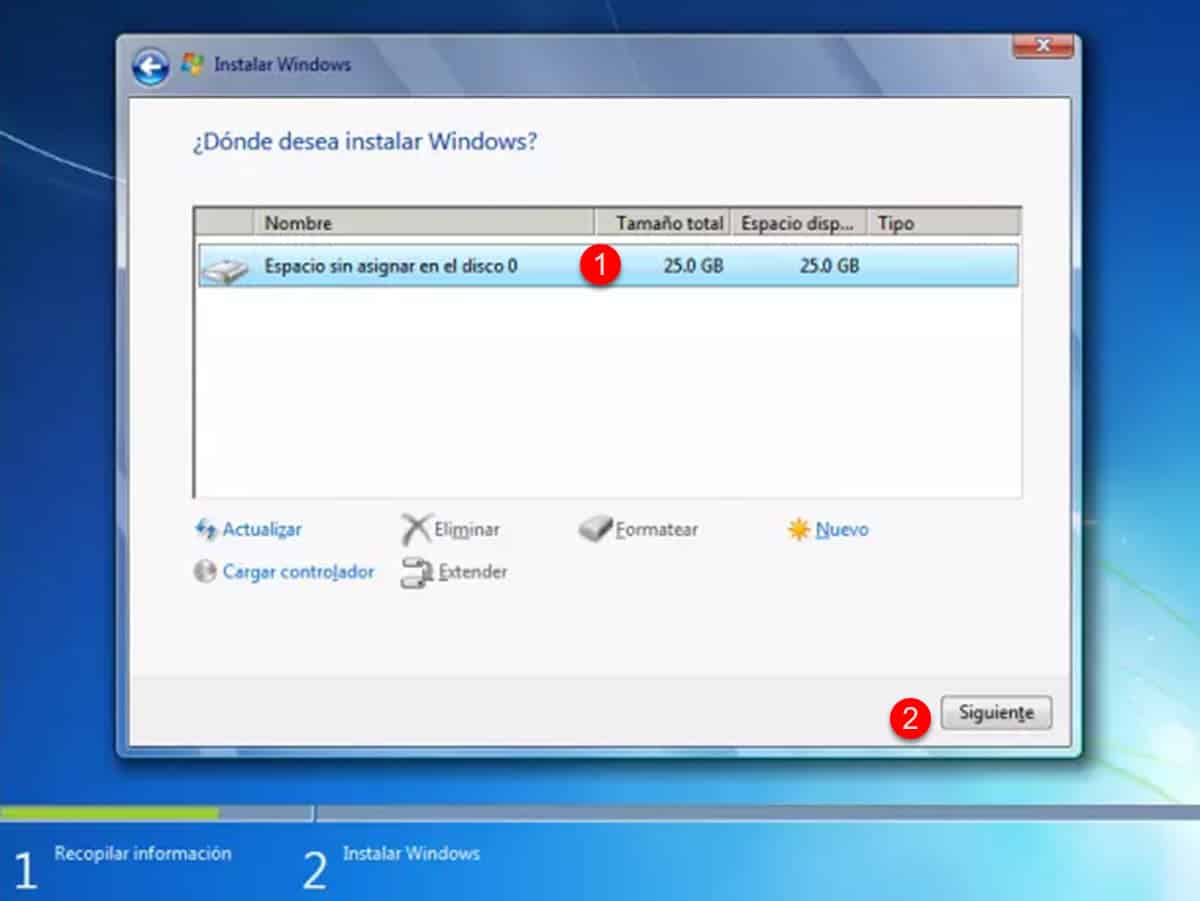
A message will appear indicating that there is a previous installation of Windows 7 and that the files will be stored in the Windows.Old folder. Accept and then the reinstallation will begin, which could take around 20 minutes.