![]()
Today, one of the most widely used mobile operating systems is Android. This makes multitude of developers are responsible for launching versions of their applications for this operating system, in addition to that from Google they continually launch improvements.
In general, it is not used much in computers, so Google focused on other operating systems for computers. However, as multitude of games and applications are available for this operating system but not for Windows, it might be interesting to create a virtual machine with this operating system.
So you can create a virtual machine with Android in VirtualBox
As we mentioned, in this case it can be very useful to install Android on Windows. exist great emulators like BlueStacks that allow you to easily use this operating system, but if you prefer the full experience without customization, it might be a good idea to install it on a full virtual machine.
Previous requirements
First, to be able to create the virtual machine you will need to previously install on your VirtualBox team. It is a completely free program of which we have already spoken on several occasions and that allows you to easily emulate other operating systems, and if you don't have it yet you can enjoy download it from the oracle website for free.
Once the program is obtained, say that also you will need an Android ISO file to be able to install it. In this sense, Google does not provide such files as such, so it will be necessary to go to third-party sources. One of the best known projects in this regard is Android x86, which allows you to install an Android version on any 32-bit or 64-bit computer, being perfect for this case.

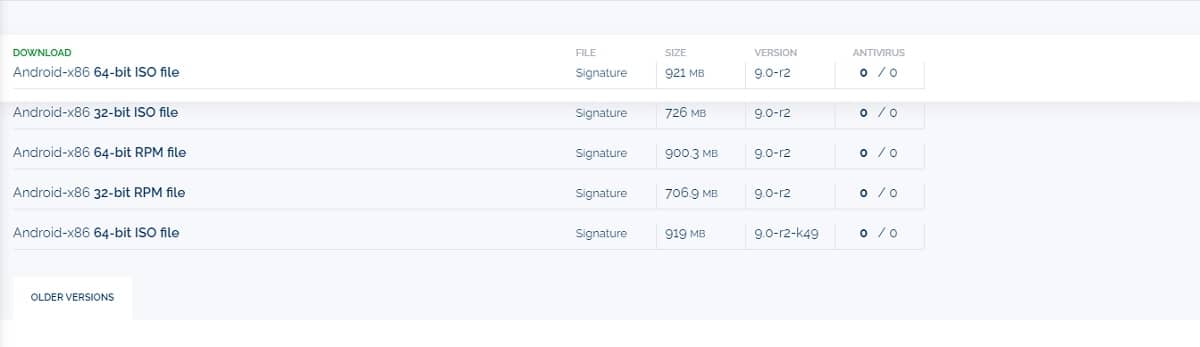
To obtain the ISO file in question, you will only have to go to the free libraries in which the project is available, such as Foshub, and choose the 32-bit or 64-bit file depending on the architecture of your computer (usually 64-bit).
Create a virtual machine in VirtualBox
Once you have obtained all the necessary files, you can start creating the virtual machine to later install Android on it. To do this, you must first open VirtualBox and then choose the "New" option that appears at the top. When you do this, a wizard will be displayed in which you will have to answer some basic questions to create the virtual machine:
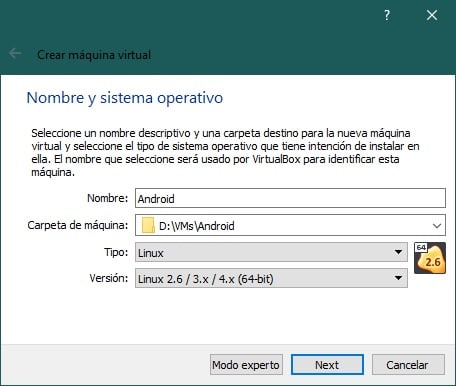
- Name and operating system: choose the name you want for the virtual machine. You can also change the location if you wish, but you must choose the type Linux and as operating system Linux 2.6/3.x/4.x along with the architecture (32 or 64 bits) that you have chosen when downloading the ISO.
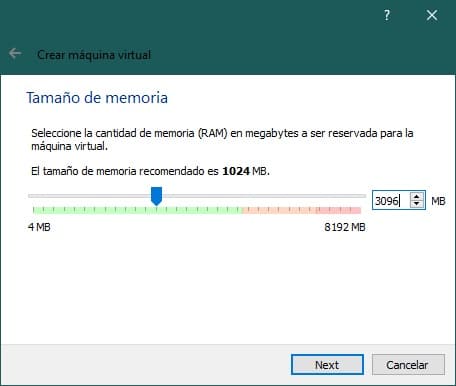
- Memory size: you must select the amount of RAM you want to allocate to the virtual machine for it to work. From Android-x86 they recommend at least 2 GB (2048 MB) of RAM for optimal performance, but you can select what you want.
- HDD: you must choose the option Create a virtual hard drive now Unless you already have one. It is best that you leave the default options (VDI, Dynamically booked) and that, if you wish, change the capacity of the disk or its location, since it is stored like any other file on your PC.

Install Android in the virtual machine
Once the virtual machine in question is created, we can begin with the installation of Android in it. First of all, you must choose the "Start" option that appears at the top and wait a moment for it to start. Doing so will bring up a window asking you where you want to boot from. Here, using the select icon, you will have to choose the location of the previously downloaded ISO file from Android-x86.

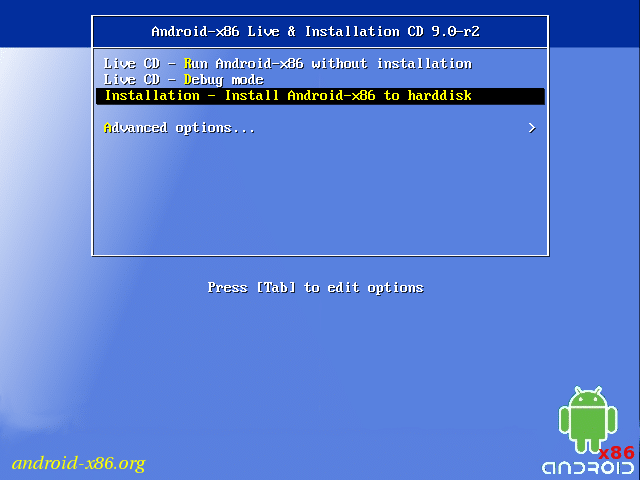
During the installation, you must use the keyboard to scroll. You will simply have to use the navigation arrows to choose the option you want and use the key Enter to choose the selected. Thus, as soon as you start up, various options will appear, including installing Android. You shall scroll with the arrows to choose "Installation - Install Android-x86 to harddisk" and begin the installation process.
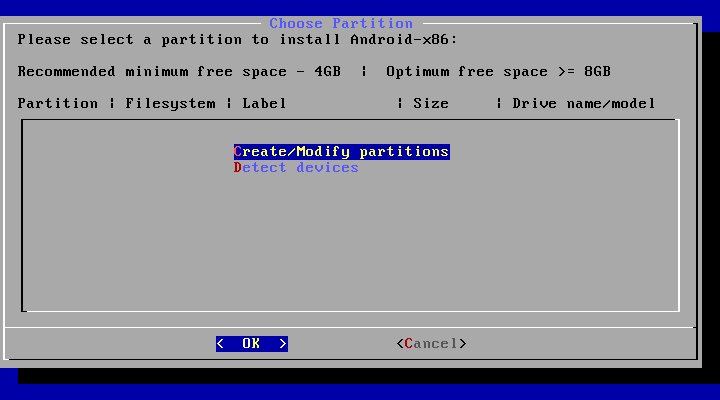
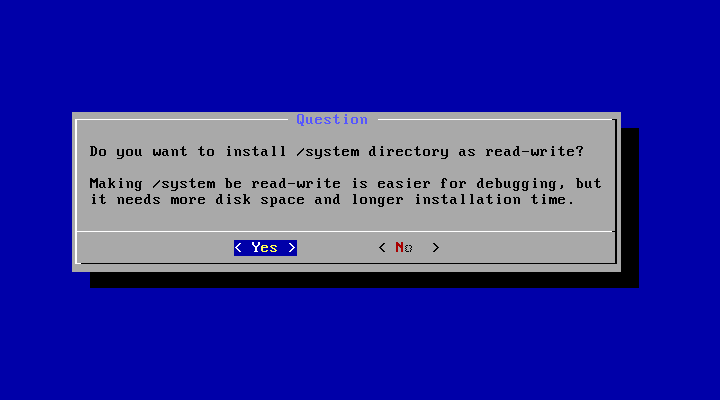
Once selected, the installer will start, which in this case will only be available in English and without a graphical interface. First of all, the different storage units on which it is possible to install Android will be shown. Here, you must use the down arrow to go to "Create / Modify partitions" and be able to edit the partitions. Automatically, it will appear a question related to GPT, where you should select not.
Then, within the partition map, you must look at the bottom to move with the left and right arrows and press Intro on the option in the following order, to create a new partition on the virtual hard disk in which it is possible to install Android-x86: "New", "Primary". Now you must press again Intro with the default space and then choose the option "Bootable"followed by "Write" to write the changes to disk. To confirm, you will have to write the text yes and press again Intro.


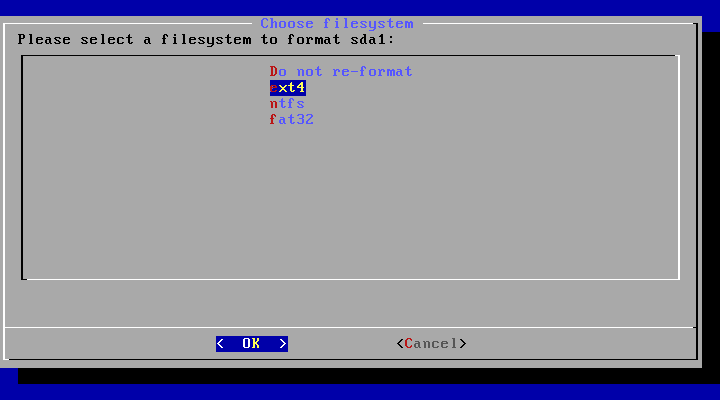
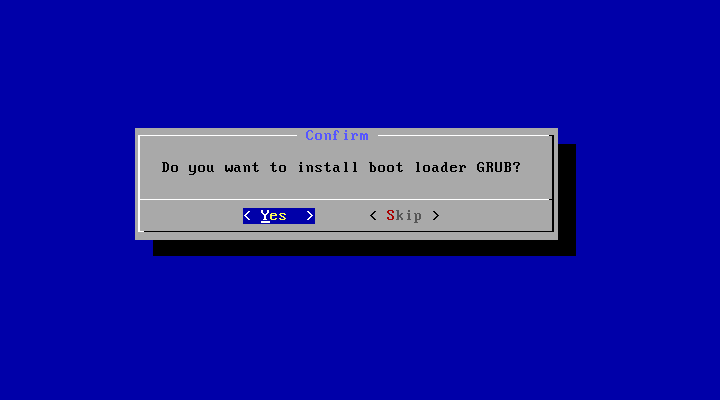
By doing this, you will be able choose the option "Quit" to exit, and you will see how a new album now appears in the menu from before. All you have to do is press Intro to start with installation. You shall choose “ext4” as the format for the disk, and choose “yes” in the questions about the GRUB schema and about making the directory read and write permissions so that everything works properly.
Once this is done, the installation process will begin which will last a few minutes. When it is finished, you just have to restart the virtual machine and the Android home screen will finally appear.
Getting started with Android
Once the system is rebooted, you can start using the mouse as if it were a mobile device. In the first steps of configuring the operating system, you will have to choose some basic options such as language or region, in addition to the typical Android settings.
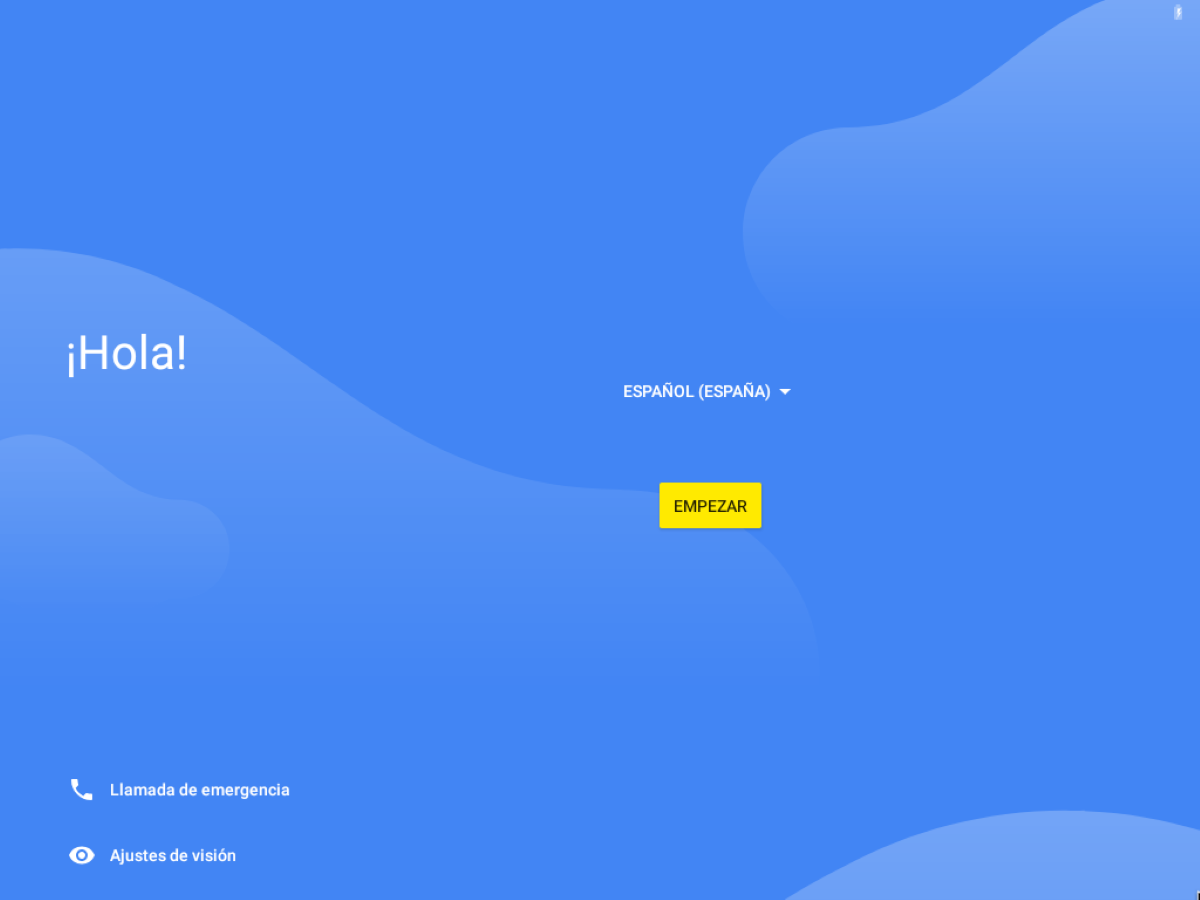
Once the operating system is configured, you can start using it as if it were an Android tablet, although it is true that some movements can be somewhat uncomfortable to perform using the mouse, except on computers with a touch screen.