
Over the years, security has become an increasingly critical factor for users of operating systems. In this way, Microsoft was adjusting this aspect in the different versions of its software, with the purpose of providing greater protection to people's experience and data. However, there is a very basic need that up to now remains indebted within Windows environments and that of putting a password on a folder. Therefore, we are going to show you the different ways that we have available to do so and avoid unwanted access to our sensitive information.
If you have files that you want to keep safe, under a password and you don't know how to do it, here we will give you the simplest and easiest options to use to protect your data.
Ways to put a password on a folder in Windows
As we mentioned earlier, Windows does not offer a native mechanism for passwording a folder. This is a major deficiency in the operating system, which forces users to use third-party tools. While this meets the present need, it can sometimes be counterproductive to put our sensitive information in the hands of another company. In this sense, below we will detail which are the safest and most effective processes to fulfill this task.
Knowing these methods is essential, because it will allow you not only to know a variety of ways to protect your folders, but also to leave behind the old practice of simply hiding files.
Using Winrar
The first mechanism to put a password to a folder that we are going to present is through a compression application. Actually, it can be any, because in general, they all provide the possibility of applying passwords. However, for our example we will use WinRar because it is the most popular of its kind and the one that almost everyone has on their computers. In addition, it is worth noting that this is one of the easiest and safest ways to apply locking a folder.
To get started, find the folder you want to protect and right-click it. Then, click on the option «Add to file…» from the context menu, this will open a small window.
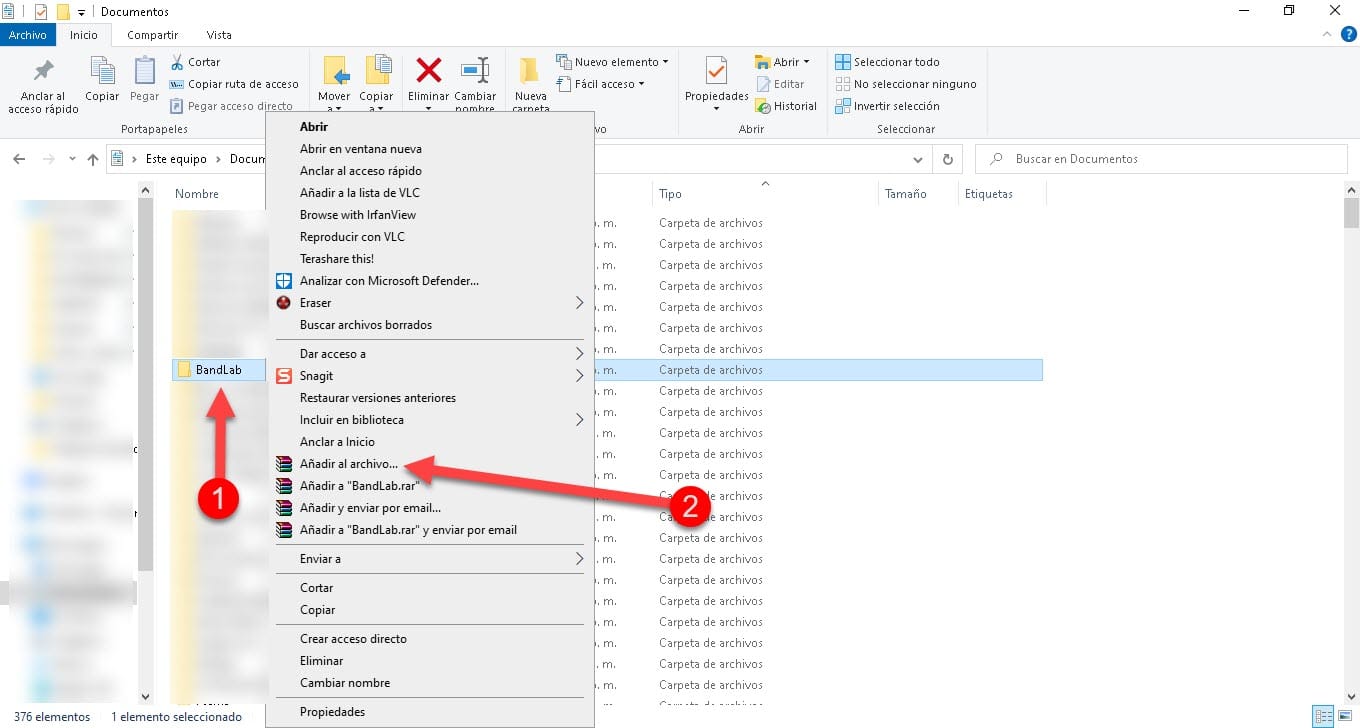
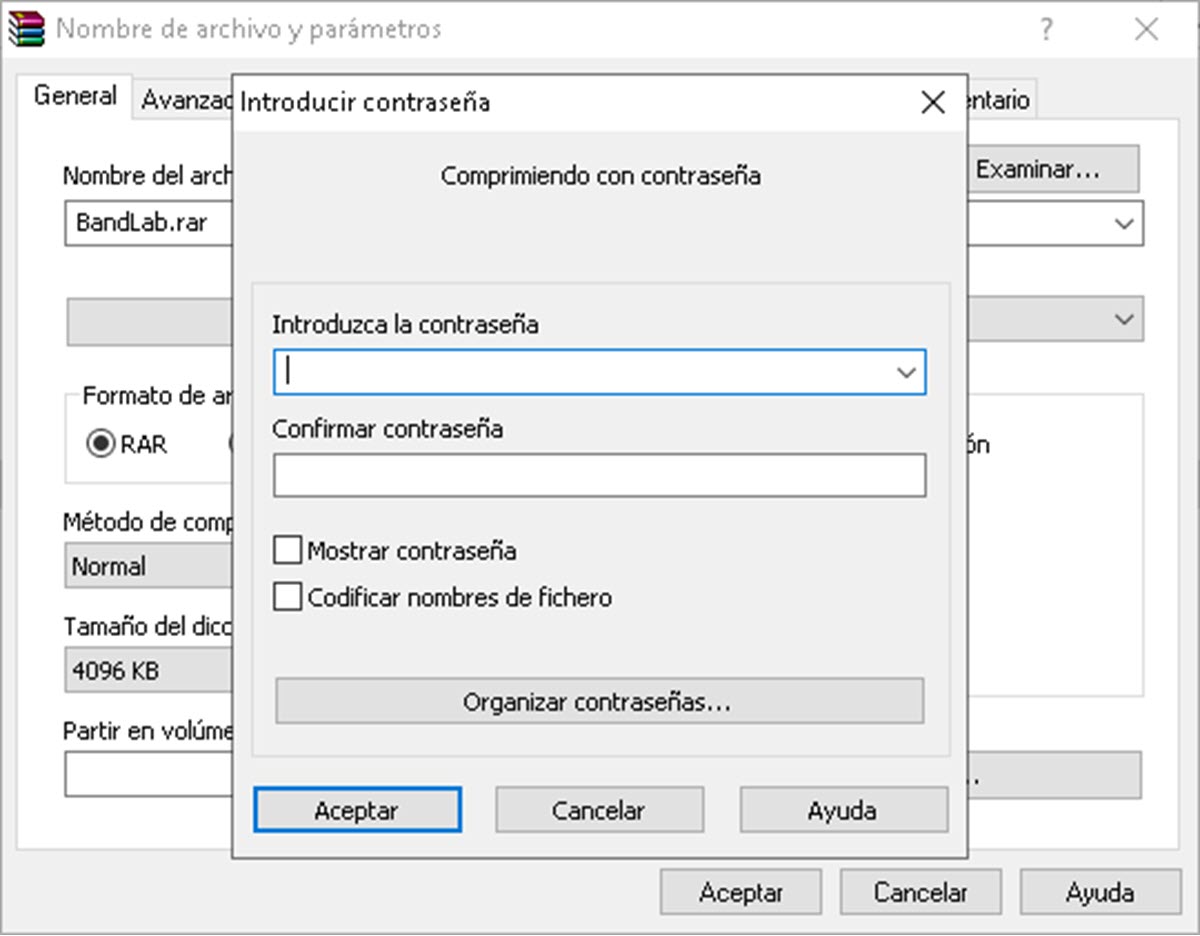
At the bottom right you will see the button «Set password«, click it and write the key with which you will protect the file. Finally, click on «Accept«.
Now, delete the unzipped folder and keep the zipped file. When you want to see the files, just double click on it and it will immediately request the password to display the content.
Through a script
Previous steps
This mechanism may not be the friendliest, but it is the way to put a password on a folder in Windows, without the need for additional applications. Instead, We will use a script with which we will generate a file in BAT format that will be in charge of requesting the password when entering a folder.
To understand it better, a script is nothing more than a set of commands that execute a series of actions for a specific purpose, in this case, protecting a folder. For its part, the BAT file is nothing more than an executable that we will generate with the list of commands that the script presents.
Additionally, we must highlight that, to carry out this procedure correctly, we must have the option of not showing hidden files enabled. To do this, open Windows Explorer, go to the "View" tab and uncheck the "Hidden items" box.
Create the script and BAT file
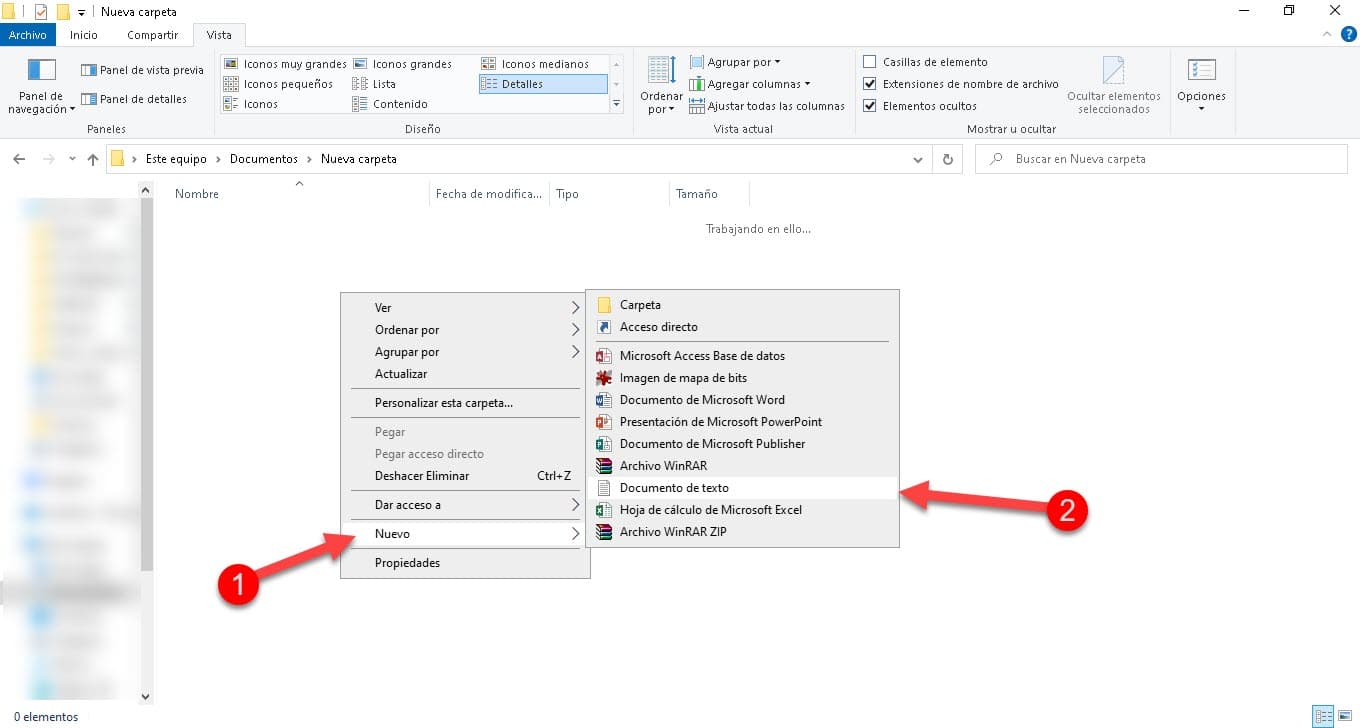
Now we will go directly to the matter. In this sense, the first thing will be to create a notepad file and we do this by right-clicking on an empty space in Explorer or on the Desktop, then go to “New»And select«Text document", giving it whatever name you want.
Immediately open the text file and paste the following:
class
@ ECHO OFF
title Folder ProtectedFolder
if EXIST «Control Panel. {21EC2020-3AEA-1069-A2DD-08002B30309D}» goto UNLOCK
if NOT EXIST ProtectedFolder goto MDLOCKER
: CONFIRM
echo Do you want to hide the ProtectedFolder? (Y/N)
set/p "cho="
if% cho% == S goto LOCK
if% cho% == s goto LOCK
if% cho% == n goto END
if% cho% == N goto END
echo Invalid choice.
goto CONFIRM
: LOCK
ren CarpetaProtegida «Control Panel.{21EC2020-3AEA-1069-A2DD-08002B30309D}»
attrib + h + s «Control Panel. {21EC2020-3AEA-1069-A2DD-08002B30309D}»
echo Folder locked
goto End
Unlock
echo Enter the password to display the ProtectedFolder
set /p "pass="
if NOT %pass%== CHOOSE-PASSWORD goto FAIL
attrib -h -s "Control Panel. {21EC2020-3AEA-1069-A2DD-08002B30309D}"
ren «Control Panel.{21EC2020-3AEA-1069-A2DD-08002B30309D}» CarpetaProtegida
echo Folder Unlocked Successfully
goto End
AIL
echo Invalid password
goto end
: MDLOCKER
md ProtectedFolder
echo ProtectedFolder created successfully
goto End
: End

Next, we need to replace the script variable identified as “CHOOSE-PASSWORD”, with the password we want to add.. In this sense, you will only have to delete the text, write what you want as a key and that's it.
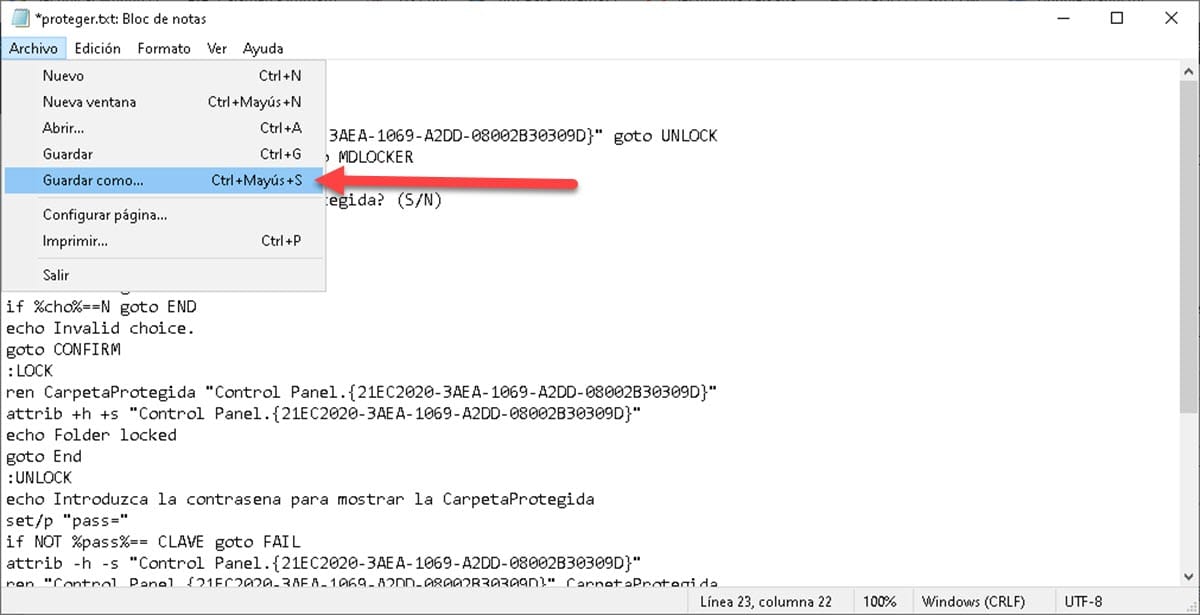
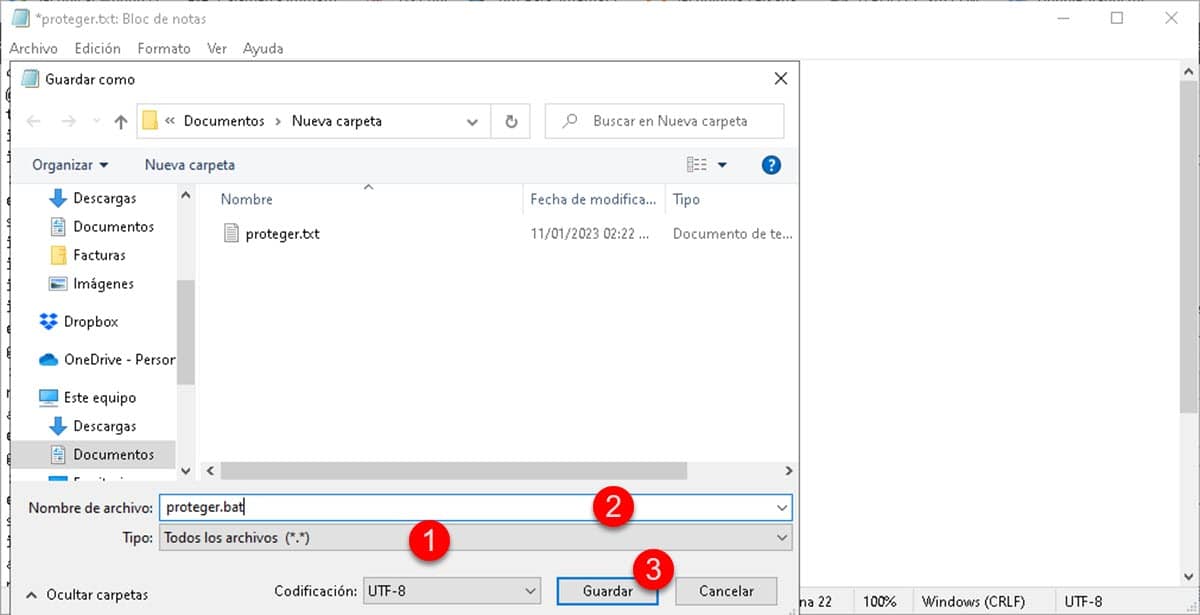
We will proceed to save the file in BAT format and for this, click on “Archive", Choose "Save as", this will bring up the Windows Explorer window. Now, click on «Type» and choose «All the files", to then give the file whatever name you want with the .BAT extension.
Then, click on the executable file that you just created and you will see how the new folder is generated. Go into it and store everything you want, when you are satisfied, double click on the executable again and the folder will be hidden. When you want to enter again, double click on your .BAT file and you will see how a Command Prompt window is displayed requesting the password.

It should be noted that, for everything to work correctly, the executable must be in the same directory as the protected folder when you double-click it.