
Microsoft's operating system, Windows, has been characterized by being an operating system compatible with billions of different computersWhile macOS, Apple's operating system for your PCs, is only compatible with a few dozen PCs.
If we take into account the compatibility required by Windows, it should not be surprising that, from time to time, we encounter some malfunction, blue screens, performance lapses. All these problems, always They originate from software and hardware problems.
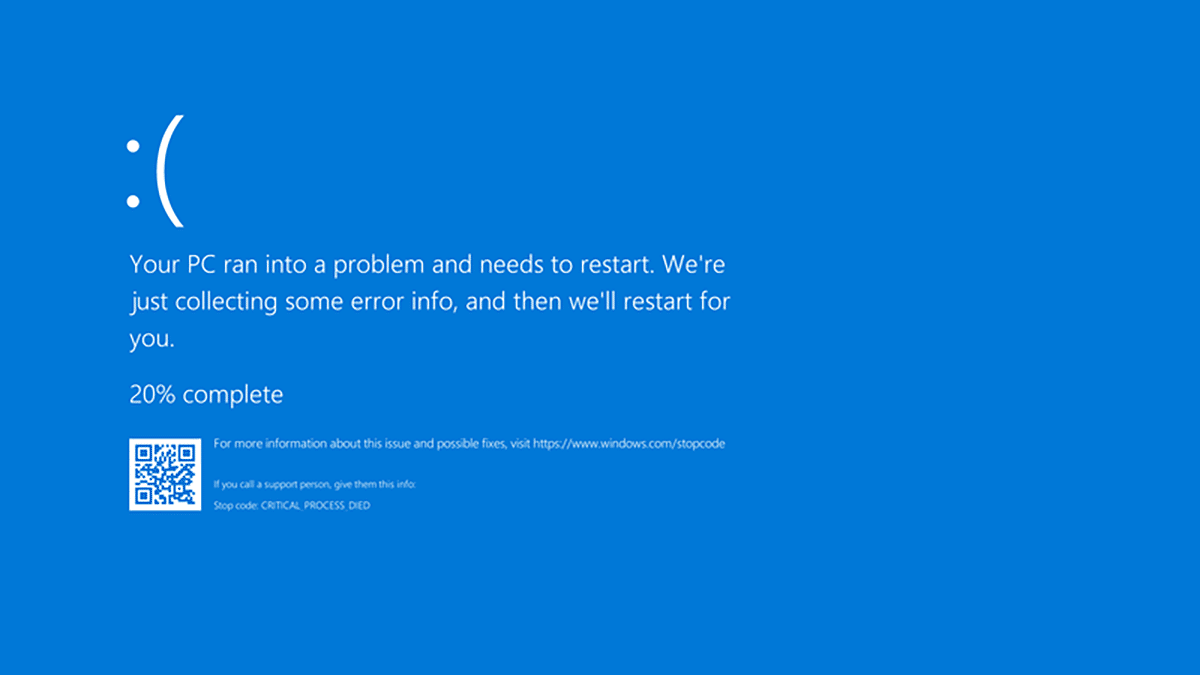
If our computer begins to give blue screen problems, it is slower than normal, it takes life to start up, its performance has dropped a lot ... before you start looking online for a solution, you should restore our computer to a previous restore point.
What does system restore mean in Windows?
Restore a previous point Windows, it means that the computer will uninstall all applications and drivers of components of our computer that we have installed since the last time we created a restore point or it was created automatically.
This process It does not affect the images or files of all kinds that we have stored in it. It only affects the functioning of the system, not the files that we have stored in it.
Restore points only store device configuration data, does not make a backup copy of our content.
This task we must perform using other alternative methods such as a windows backup, using an external hard drive, a cloud storage platform ...
We can create the restore points ourselves, but also the system is also responsible for creating them every time we install an application that may affect the operation of the equipment.
How to create a previous restore point
For create a previous restore point in Windows In order to use it in the future if we need it, we must carry out the steps that I show you below:
- First of all, we go to the Windows search box and type Create restore point. We click on the first result that is shown.
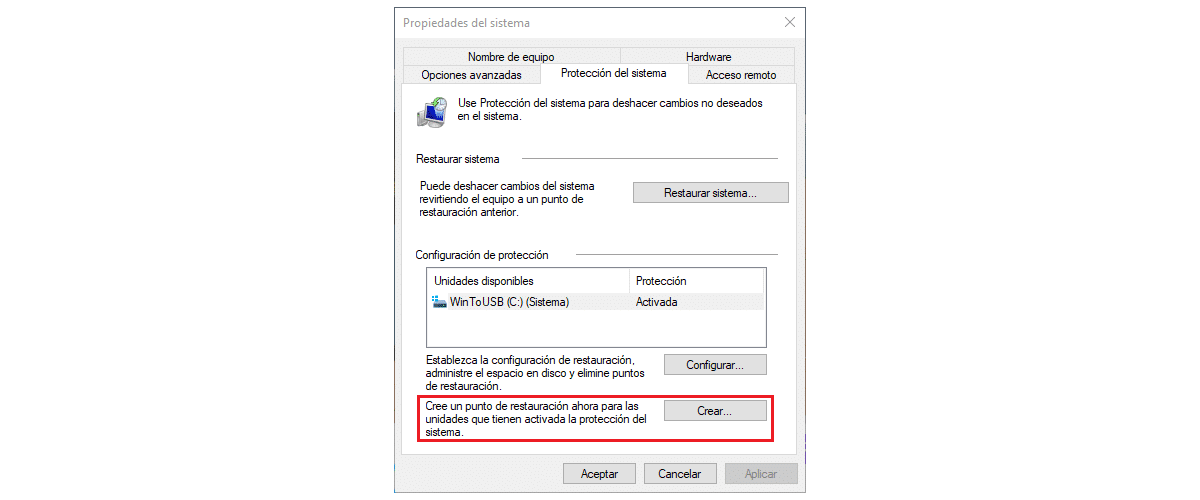
- Next, we go to the bottom of the window and click on Create.

- Next, we must enter the name with which we want recognize restore point that we are going to create. For example, "Before updating the graphics drivers".
- Once the name is entered, Windows will create the restore point of the computer, a process that lasts a few seconds or minutes (depending on what type of storage our SSD or HDD has).
- Once it has been done, it will show us the message The restore point was created successfully.
How to restore Windows 10 to previous point
For restore Windows 10 to restore point that we have previously created, we will carry out the steps that I show you below:
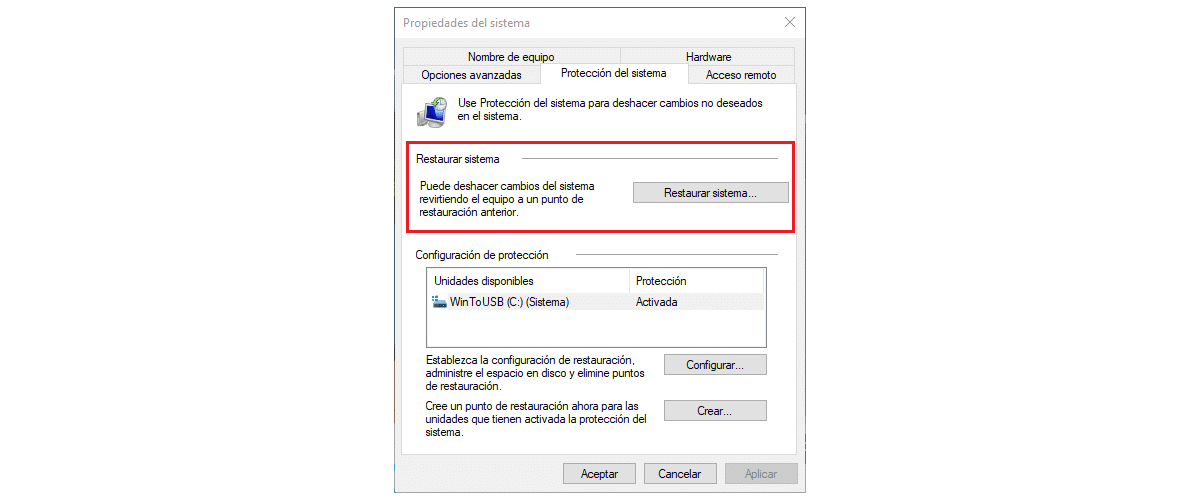
- First of all, we go to the Windows search box and type Create restore point. We click on the first result that is shown.
- Next, we go to the bottom of the window and click on System Restore.
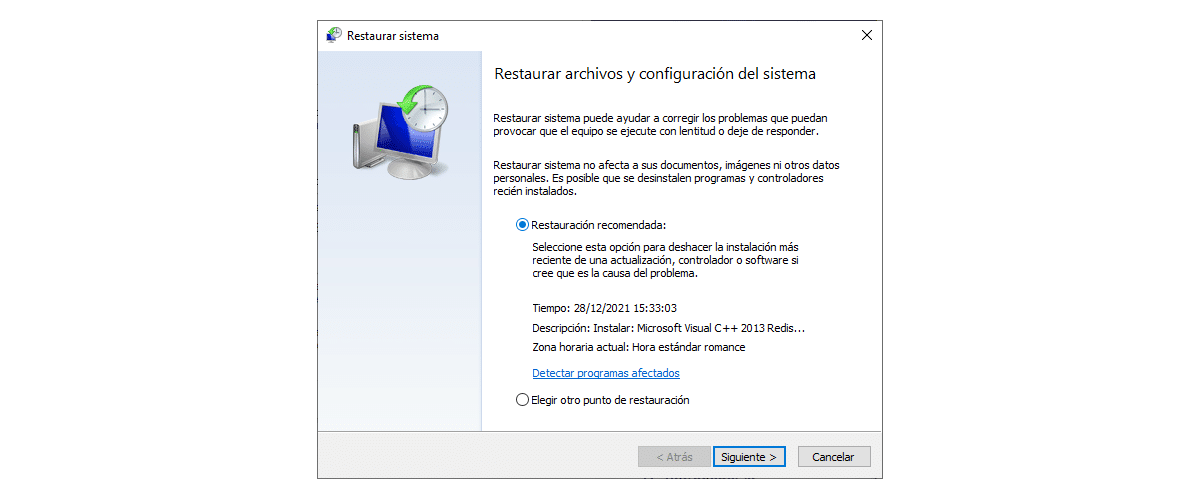
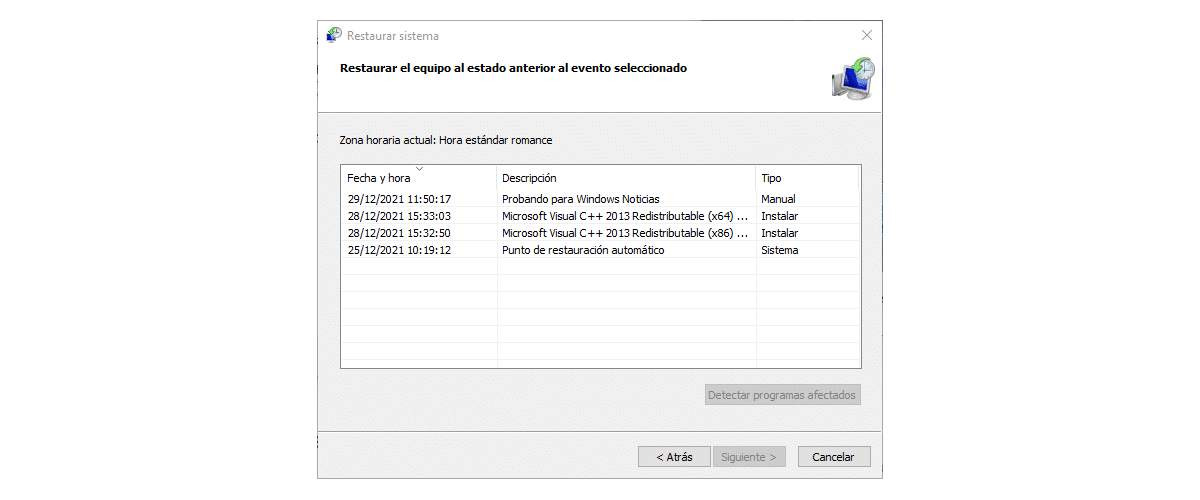
- Next, a window will appear that inform us what the restoration process consists of, a process that does not affect the documents, images and other personal data that we have stored.
- The most advisable is use the immediately previous restore point, that is, the last one we did, which is the option that Windows recommends, although we also have the option of choosing which restore point we can use.
- For restore the computer using the last restore pointn that we have in our team, click on Recommended restoration and finally click on next to start the process.
Manage restore points
The restore points, as I mentioned above, they do not store the data that we have stored on our equipmentInstead, they store computer settings at the time they are created.
Translated into Spanish: take up very little space. Managing the restore points that our team has created or we have created, the only thing that helps is to make it easier to find the one we are looking for.
All restore points are ordered from newest to oldest, so it is very easy to find the last one created to restore it easily.
If you would like to erase all restore points Windows 10 (both those that we have created and those that the system has created), we will perform the steps that I show you below:
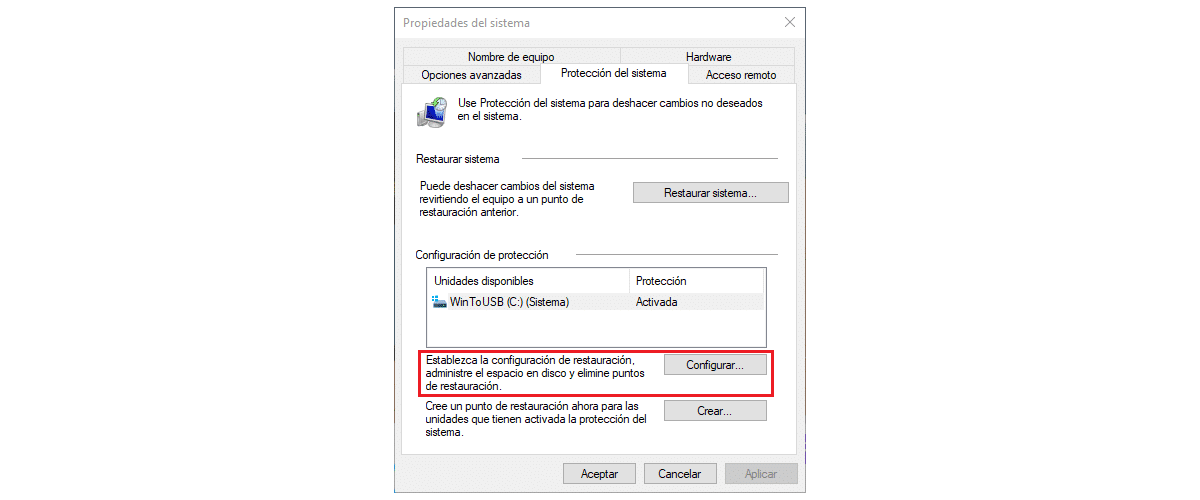
- First of all, we go to the Windows search box and type Create restore point. We click on the first result that is shown.
- Next, we go to the bottom of the window and click on Setup.
- Unfortunately Windows does not allow us to selectively remove the restore points we want and it only allows us to delete them all.
- To delete all Windows restore points, click on Delete.
Enable automatic creation of restore points
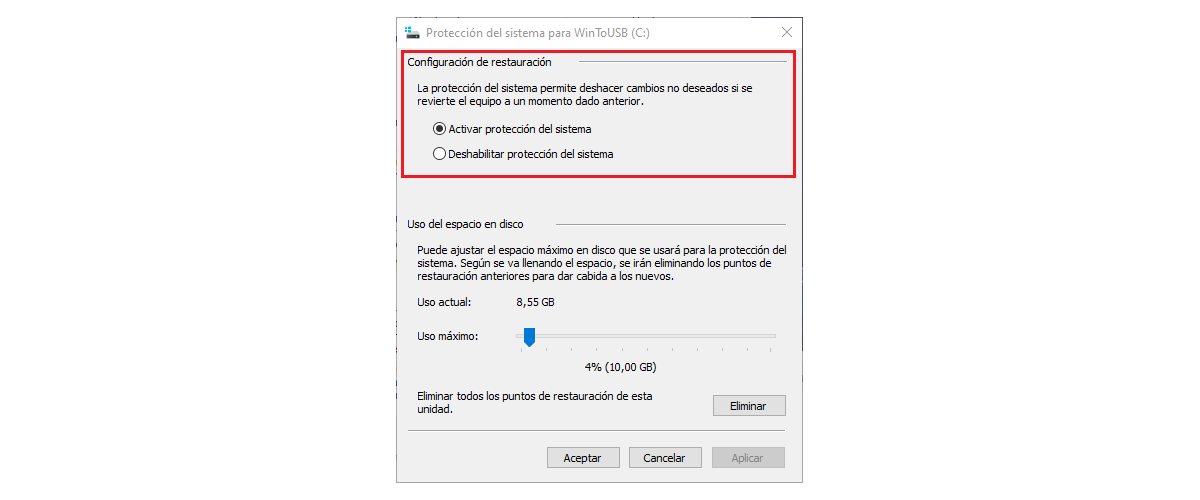
The first thing we must do, if we want to restore to the previous restore point, is, obviously, configure our computer so that, periodically perform these types of backups.
If not, we will never be able to restore Windows to a previous backup and the only solution that remains is to reinstall Windows 10 from scratch.
Windows 10 has natively activated the function that allows the creation of restore points. In this way, every time we install a Windows update, a restore point will be created.
Sometimes Windows updates affect the operation of the computerHence, the system automatically creates restore points to be able to reverse the installation.
These points they are not created with all the applications that we install on the computerAs applications usually do not, or should, affect computer performance, but it never hurts to create a new restore point before installing an application.
My computer is still not working
By restoring our equipment to a previous restore point, all updates to both Windows and other applications, including those of the drivers of our equipment, will disappear and our equipment it will work again as in the beginning.
Yes, unfortunately this is not the case, it may be caused because a component of our equipment is damaged (main reason for blue screens). The quickest and easiest solution to rule out this problem is to start Windows in safe mode.
In this mode, Windows will not load the drivers of the components of our equipment, which will allow us to rule out, or not, that it is the software of the components of our equipment.
If the equipment works perfectly, the first thing to do is identify the fault removing one by one, the components and starting the computer.
The two hardware components that affect our equipment and cause blue screens with the RAM, the graphics card and finally, the hard drive.