
Nowadays, audiovisual material has become the main source of content consumed by users around the world. We have a clear example of this in the enormous success that YouTube has had as the largest video repository on the Internet. Creating this type of material, years ago, was something reserved only for experts and those who had the possibility of acquiring the necessary expensive equipment. Today the cameras are accessible on any mobile and we can also generate videos of what happens on our computers. In this sense, we want to show you how to record the screen of your Windows 10 computer without having to resort to third-party applications.
This will open the door for you to produce content such as tutorials or recording your gaming sessions on Windows. It is a very easy task for any user to carry out and below we will tell you everything you need to know.
Record screen in Windows 10 natively
Screenshots are elements that have been with us since the beginning of operating systems with a graphical interface. A sign that this need has always been present in computing environments is that keyboards incorporate a key designed to print what is on the screen. However, as technology advances, so do the demands of the users and the scenarios that are presented, so that video became necessary.
Earlier, we mentioned that the video area was reserved for experts and required very powerful hardware. However, this became more and more simplified, to the point that we can now create audiovisual material, even from a mobile. Thus, making screen videos in Windows became something as simple as installing an application that gave us this possibility.
However, little is said about the fact that it is possible to record the screen in Windows 10 with the native options of the system. This is thanks to a feature that was really geared towards the gaming crowd, however it's functional for anyone who needs to get a video of their screen. This is the so-called Game Bar or Xbox Game Bar, which offers a series of functionalities that seek to enhance the experience of those who enjoy video games on the computer.
This bar is present in all versions of Windows 10 and offers the possibility to view information about the PC's performance, control the audio, play music from Spotify and also record the screen. To deploy it, all you have to do is press the Windows+G key combination, if it does not appear, it is because you must activate it.
Activating the Game Bar in Windows 10
Before we start recording the screen with the native options of Windows 10, we are going to explain how to activate the Game Bar. This step is critical if pressing the Windows+G key combination doesn't bring up the Xbox Game Bar. The process begins by entering the system configuration area and for this you just have to press the Windows + I keys.
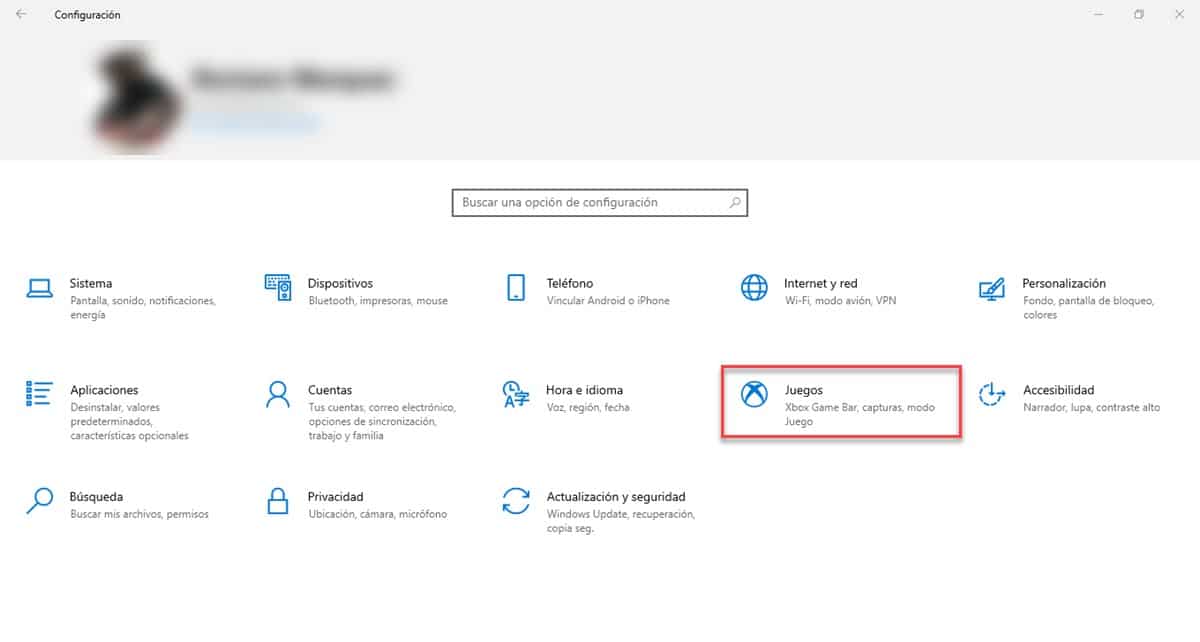
Once on the main configuration screen, click on the Games option. This will take you directly to the section we need and the first option that you will see is precisely that of activating the bar, click to enable it.
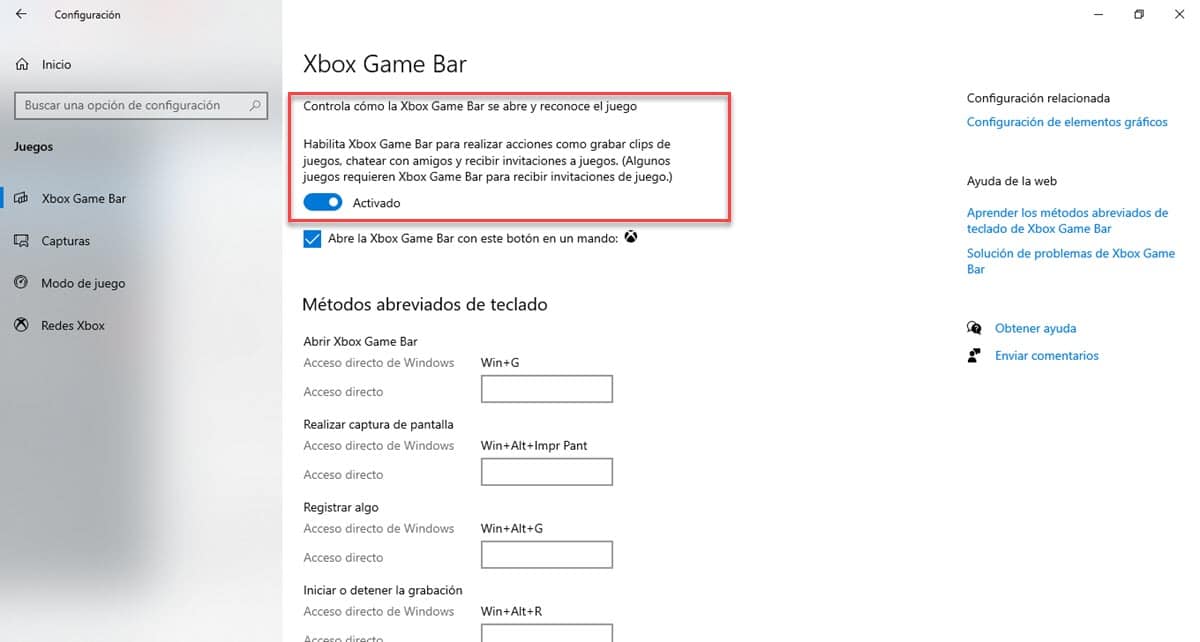
Below you will see the shortcuts, that is, the shortcuts, with which you can control the Game Bar from the keyboard. The first option is precisely to display the bar, however, at the bottom there is a field aimed at customizing access, so that you can enter another key combination that is more comfortable for you.
Steps to record screen on Windows 10 with Xbox Game Bar
The first step to record screen in Windows 10 with Game Bar will be to pull it down, so press Windows+G. At the top, you will see a series of options, the one that interests us for this task is the camera icon, called "Captures", when clicked on it, a small window will be displayed.
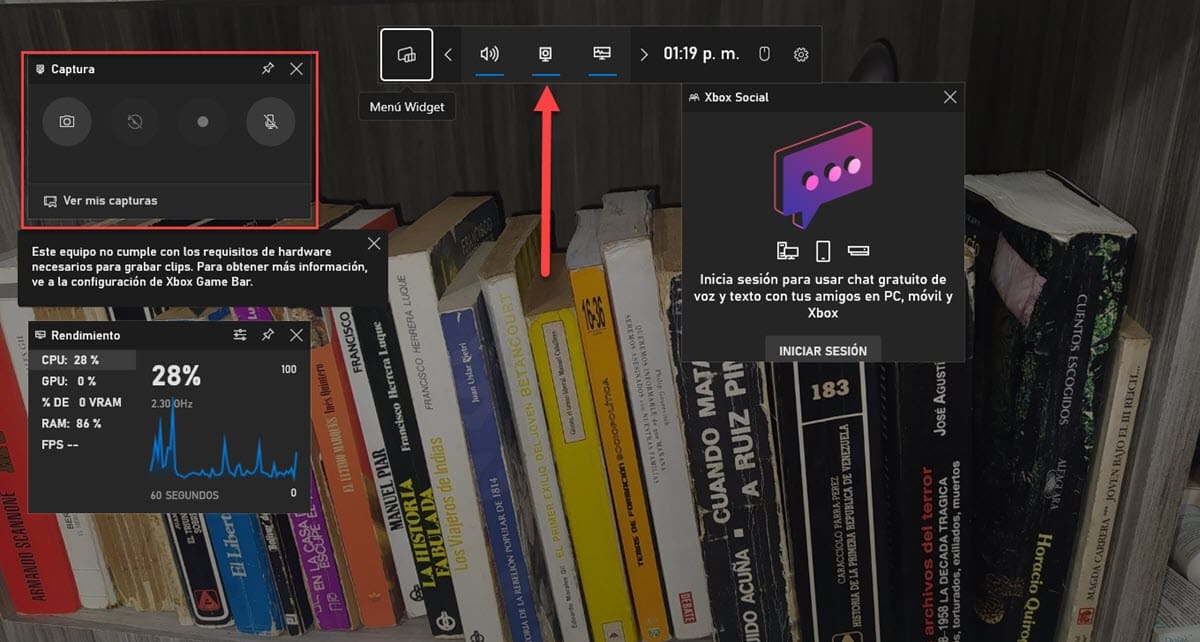
There you will see the possibility to take screenshots and also to create video clips of what happens on your screen. This is the option that interests us and to use it, you just have to click on the circle icon, aimed at starting the recording. It should be noted that you can also do this by pressing the Alt+Windows+R key combination. Likewise, with the same shortcut you will have the possibility to stop the recording.
To see the result, go to the Captures window and at the bottom you will see the option «See my catches» which will take you to a screen with your screen images and videos. Additionally, in the configuration section, where we activate the bar, there is the "Captures" section and there you can see the directory where the videos are saved by default.