
A function that has been included in version after version of the Windows operating system is the possibility that the pointer leaves a trace when moved with the mouse or mouse. In this way, you can see where it is going and thus it is more difficult to lose sight of it, in addition to the effect that it produces visually in some cases.
However, the fact that in Windows 10 there is no control panel as such to be able to access the options related to the mouse and enable or disable this function, makes it slightly more complicated in some cases. You shouldn't worry about it at all, as the mouse tail effect is still present in this version and activating it is very simple.
How to enable trace effect on Windows 10 mouse pointer
As we mentioned, as in Windows 10 the control panel is no longer fully available, what you must do to activate this pointer tail effect is to access the mouse options through the Settings app. To do this, open it on your computer and then, in the main menu, select the Devices option. Then on the left you should see a section dedicated to the mouse.
Once inside, you will see how some basic configuration options for the mouse appear. However, what you need to do to activate the mouse trail is go to "Additional mouse options", an option that should appear on the right side of the screen or below of the main settings, depending on your screen layout.
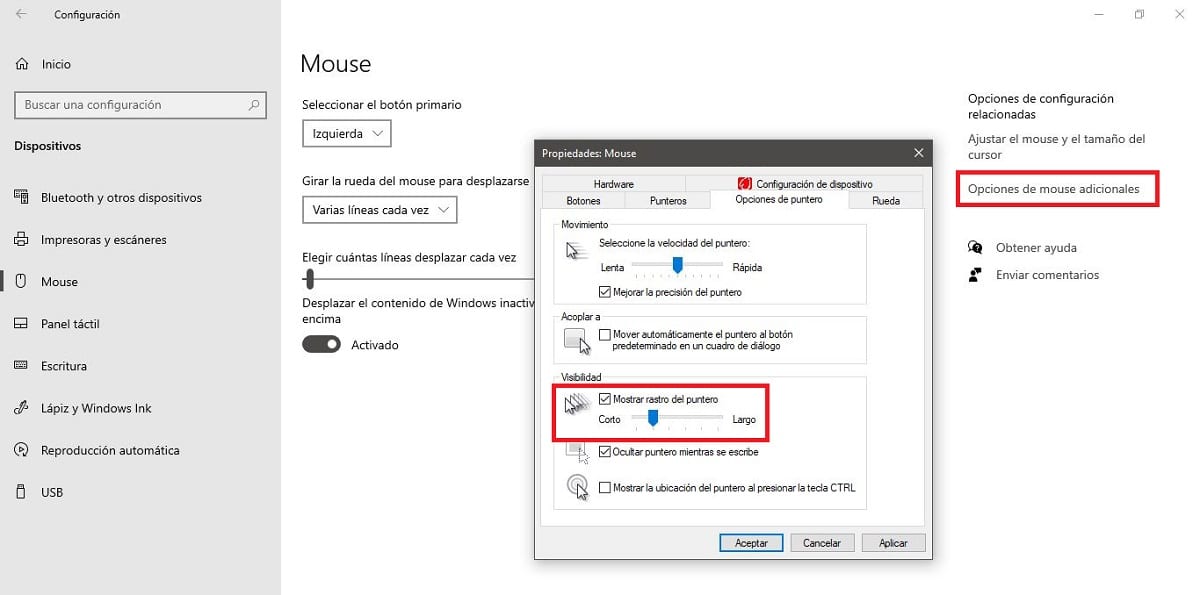
Finally, in the box that opens you will only have to select in the tabs at the top "Pointer Options", and then mark the option called "Show pointer trace". Then you will see how if you scroll the screen, this trace appears, being possible to customize its extension directly from those same options.