The screen resolution is a fundamental aspect for many users, since the PC and its screen, whether portable or desktop, is a device in front of which we will spend many hours, therefore we must adjust all the peripherals and settings in such a way that we find ourselves as comfortable as possible so as not to turn its use into an ordeal. Screen resolution becomes a key issue for many users, that's why we want to teach you how to change the screen resolution in Windows 10 in the easiest and most comfortable wayAdjusting your screen to the ideal resolution can save you a lot of headaches.
In the first place, the normal thing is that the best resolution is the highest that our screen allows us in combination with our graphics card. Therefore, first of all we are going to go to Windows Update as well as to the website of the manufacturer of our device, to make sure that we have the corresponding drivers installed, this way we will be able to squeeze to the maximum the graphic performance of our device.

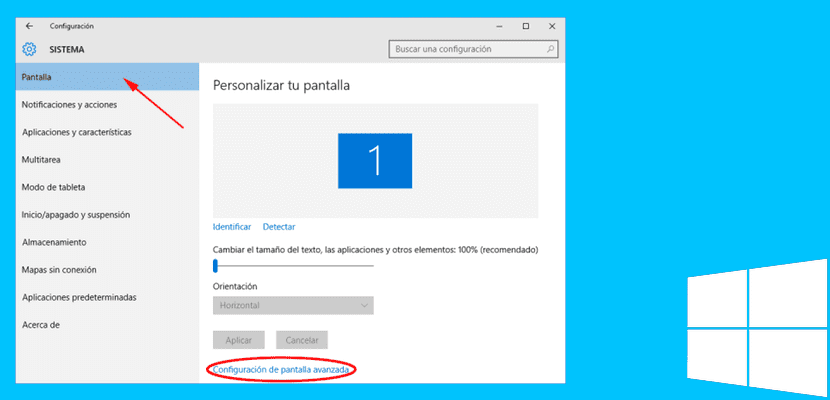
- Click on the Start Menu and choosethe configuration section.
- Select the "System" option
- In the Display option, scroll down to «Advanced display settings»
- Select the resolution and click "Apply"
- Click "Keep Changes" on the test screen to save the resolution settings.
As we have already said, habitually the best resolution is the maximum allowedHowever, there are users who prefer an extended system for some reason, one of the simplest methods is usually to decrease the resolution. In the same way, everything is a matter of getting used to, and I personally always recommend setting the device to the maximum resolution allowed, let's take advantage of our graphics card, in addition, our eyes will thank us a lot in the details.