
Security is of great importance today. We have seen how the personal data of users can be exposed on a regular basis. Either due to computer infections or security breaches in software and hardware. Therefore, it is important take certain security measures to try to have maximum protection.
Maintaining a good state of our Internet connection is important. Therefore, it is key configure IP address in Windows 10 in a simple way. In this way we ensure that we have a better Internet connection. We tell you the steps to follow below.
This time it is treated in a different way than most know. Since it is generally used the properties of the network card to configure the IP address. It is the way that most users know. But, we have a different way to achieve it in Windows 10. That is what we are going to teach you next.
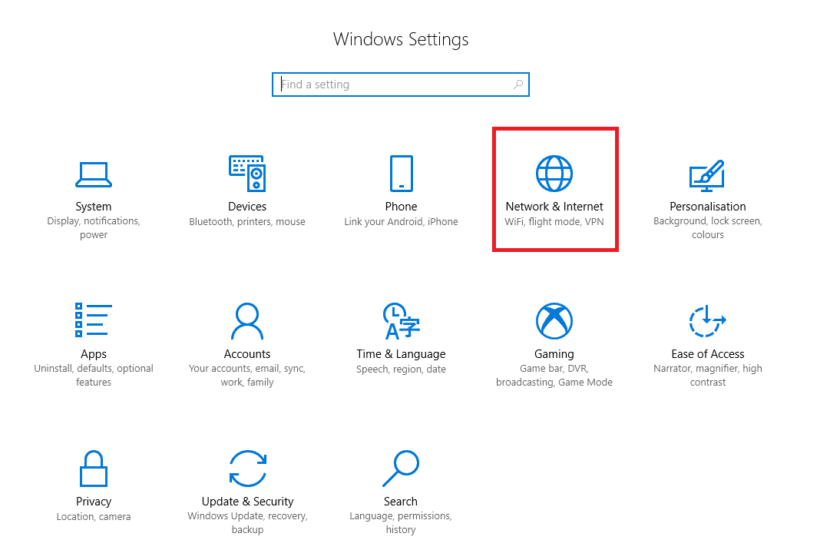
The first thing we have to do is go to Configuration and there we have to select the Network and Internet section.
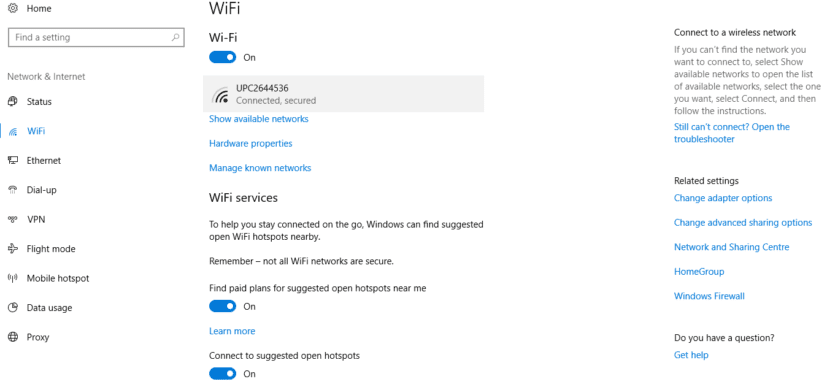
Once we have clicked on it, we get a new menu. On the left side we have to look for the option called WiFi. Then we see that we get a series of new options on the screen. The first one that comes out is the network to which we are connected at that moment. Then we must click on it and this is going to take us to a new screen.
Once we have clicked and we are in the new screen, we have to look for a section called IP configuration. Within this section we find an option to edit. We have to click on this option and it directs us to the last screen of all. In the same we can edit the IP configuration we want. We can do it manually or automatically.
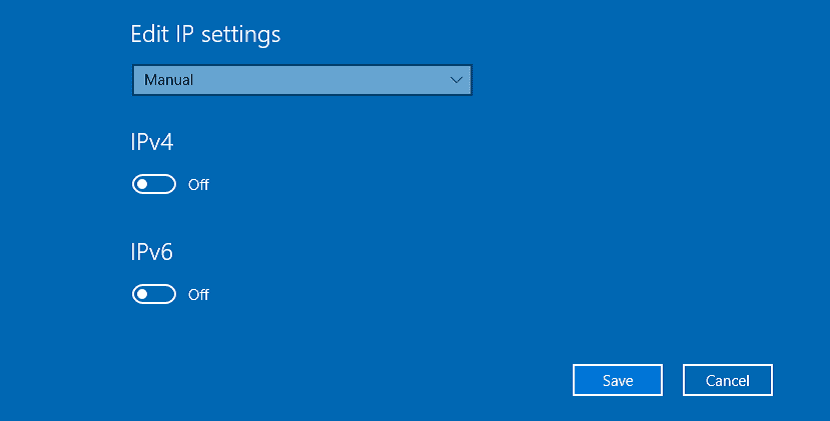
You can select both manual and automatic. So you have the option to configure the IP as you like. In this example we have selected manual so you can see everything that needs to be filled out. But, both ways are perfectly valid. Also, so you can see another way to configure IP in Windows 10.