
If we are one of the users we like customize our team to the maximum, it is more than likely that we like to make use of the option that Windows offers us to include an image in our user account, an image that we can establish when we first install Windows 10 from scratch.
If over time you want to change the displayed image or avatar, as the case may be, in this article we show you how we can change the image of our Microsoft user account. Using a user account in our Windows 10 account is the best option to be able to have our computer protected at all times.
Modify Windows account image

- Once we have selected which image we want to establish in our user account, we must access the settings of our account through the Start Menu.
- Once we have opened the start menu, we go to the image of our user and click on it Right mouse button to access our account options.
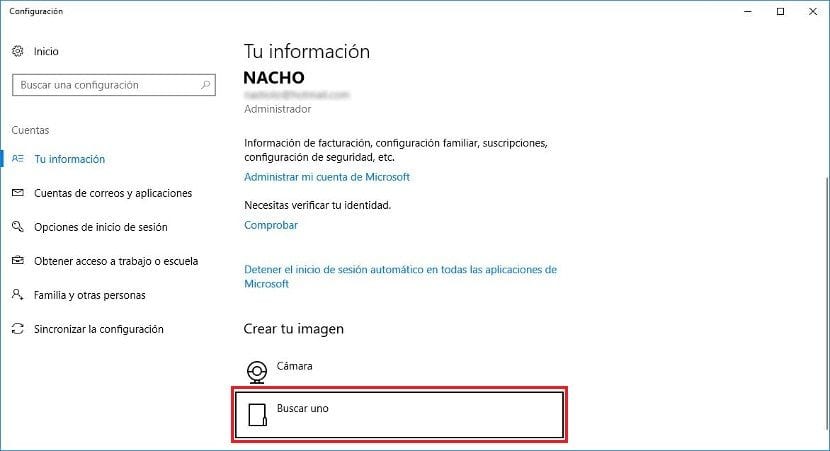
- In the Create your image section, we select Find one and we go to the directory where the image is stored that we want to use in our user account.
- Once we have selected the new image that we want to establish, it will already be available in our user account without having to restart our computer in any moment.
Within the Your information section, we will find all the images that we have used so far in our user account, so if we want to revert the change and reuse an image that we had used previously, we just have to select. These images are on the right that our user account shows us in this section.