
When we have just updated our PC to Windows 10 for the first time, as long as we have performed a clean installation, one of the first steps we must take is to connect to the internet, so that our PC automatically checks if there is a new update to install. Fortunately, Microsoft ensures that it will only release one update per month, unless it is a security update, that it will launch them immediately as soon as the problem has been solved from Redmond. If we have just installed Windows 10, one of the first steps that the operating system asks us is that we connect to our usual Wi-Fi network in the processes prior to the final configuration of the system.
The problem may arise when we go to a friend's house and want to connect to their Wi-Fi network. In this case, below we show you all the steps to follow in order to make the connection successfully. As you can see, the steps are very simple and in just a few minutes you will be able to navigate on our laptop or PC using another Wi-Fi connection other than our home.
Connect to a Wi-Fi network with Windows 10
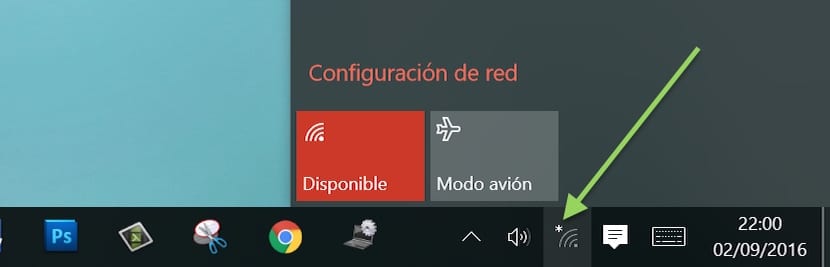
- First we go to the icon of the Wi-Fi network on our computer. Right now will be displayed along with an asterisk.
- By clicking on it, all nearby Wi-Fi networks will be displayed of our location and those that we can connect as long as we know the corresponding password.
- We select the one we want to connect and click on connect.
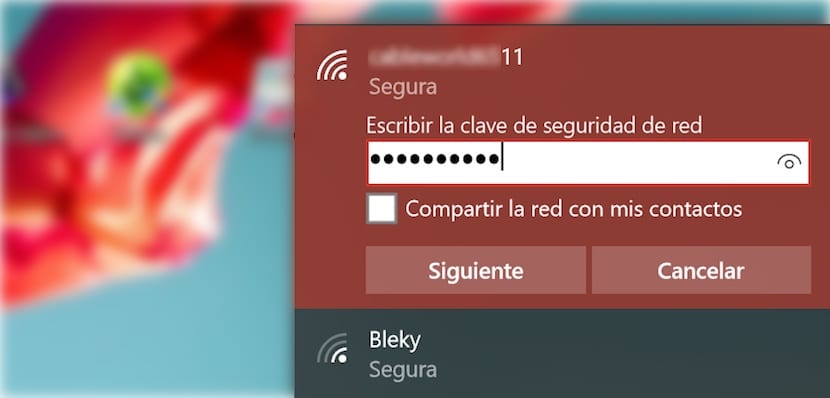
- After checking the security requirements (which does not require the Mac of our device for example) we must enter the network password and click on next.
- Next we will be shown a message requesting our approval or not for other PCs connected to the same Wi-Fi network to detect us. If we are at work or at home and we want to share documents with other computers we must press YES. If we are in open or password-protected public networks, we must press NO, to prevent any other user from accessing our PC.
- Once we have entered the password correctly, the name of the Wi-Fi network to which we have connected in the first position will be displayed under the name Connected, secure.
Keep in mind that every time we enter the password for a new Wi-Fi network this it is stored and we will no longer have to re-enter it unless the owner modifies it. In that case, Windows 10 will not show a message informing that the stored password is not correct and that we must enter a new one.