
GIFs have become hugely popular around the world. This is why many people seek to use them. Especially since many websites, such as social networks or messaging apps, support them. When creating a GIF from video, there are several options available. Although Giphy is possibly the most comfortable of all in this sense.
Therefore, if you want to create your own GIFs using GiphyFrom a video, we show you the steps to follow. You will see that it is not complicated, but it is very useful. Especially in case you want to share them in conversations with your friends, or on social networks.
On Giphy, users have the possibility to create a GIF from any YouTube video. So it is something that gives many possibilities in this regard. In addition, on the website itself there are a huge number of GIFs already available, in case you want to use one that other people have already created on it. It even has a search engine at the top. What gives many facilities at the time of use.

In this case, what interests us is to be able to create the GIF in question. Therefore, when we enter the web, we have to click on the Create button, which is located in the upper right part of the screen. By doing this, the web creation process will begin. In it we will have to follow a few steps.
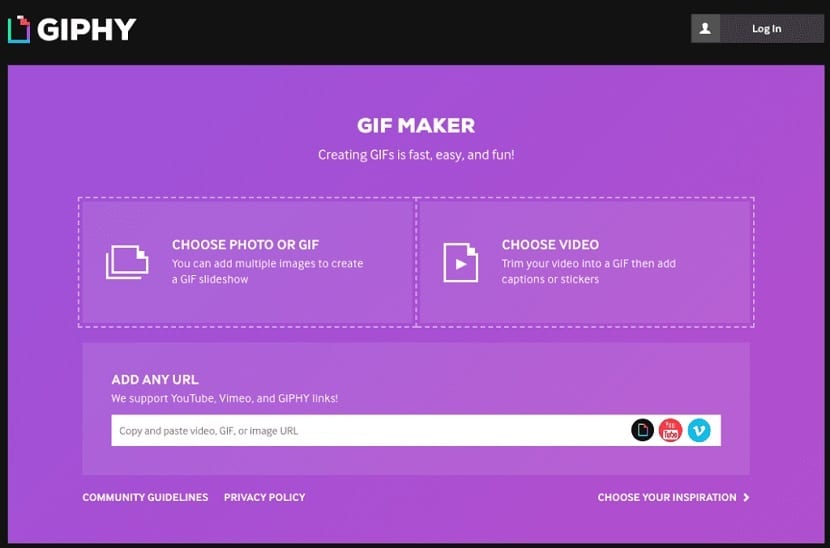
The first thing we are asked is the origin of the GIF in question. Therefore, it may be something we have on the computer, or as in this case, a YouTube video, which is the option we have to choose. Then we have to copy the link of the video in question on Giphy. In this sense, there is an important limitation, which is good to take into account. Since the video in question cannot exceed 15 minutes in length. So it is important to take this into account in this process.
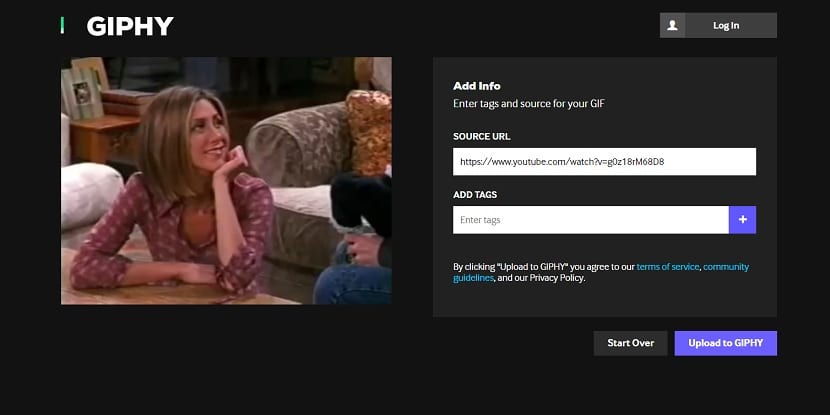
Then, when we have copied the URL of the same, we will see that Giphy recognizes the address of the same almost immediately. In the left side we will then see the preview of the GIF in question. While on the right we have the controls, for the creation of it. Here we will be able to adjust its duration, the moment in which we want it to start, etc. We therefore have to find the moment in the video that we want to capture as a GIF in this case. When we have done it, you just have to click on continue.
Giphy takes us to a second window, in which we have the possibility to add some additional decoration to the GIF. The web gives us in this sense a series of tools. We can add text, with many different fonts. We also have the possibility of using a series of stickers, to add to the GIF in question. Besides, there are also drawings that can be added in it. So each user will be able to choose in this sense what they want to add. When this has been done, you have to click on the continue button, to reach the final step in this process.
Since in this step the GIF in question is uploaded to the servers. It is a process that will take a while, a few seconds in most cases. Then, when it has been uploaded, we can already see the final GIF on the computer screen. The web gives us here some options on what to do with it. It can be saved, shared on social networks or by email if you want. Here it is each user who must choose what they want to do with their own creation. The possibilities are many in any case.