
In Windows 10 we have a large number of functions available, which give us many options. One of them is to delete old files automatically. To do this, we have to use a script that gives us this possibility. So we can forget about the recycle bin, since the system itself will do it without us having to do anything.
It is a way to optimize the hard drive of our computer with Windows 10. In addition to automating a process, so that we will not have to do anything. This function requires us to select a folder, at our choice, in which old files are automatically deleted.
Depending on the version of Windows 10 you have, the process may be somewhat different. If you have Redstone 4, you don't have to apply the script. For other users it is necessary to do so. So it is good to know the version we have, because the process would be shorter or longer.
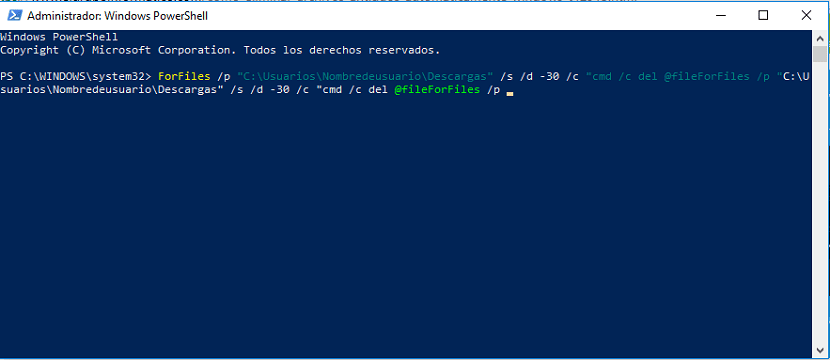
First of all we have to run Windows PowerShell as administrator. Therefore, we look for Windows Powershell in the search bar of the taskbar and we right-click and we give it to run as administrator. Once we have it open, we need to enter the following code:
ForFiles / p “C: \ Users \ Username \ Downloads” / s / d –30 / c “cmd / c del @file
Once this command has been entered, if we press enter, files that are in the download folder and are older than 30 days will be directly deleted. Although we have the possibility to change the location and the deadline in a simple way. Since the location is specified in the command, we can choose ourselves. Also the deadline "d-30" can be changed.
Thus, we set the age limit of these files in Windows 10 in a certain folder. So in this way we create the command that best suits our situation. And in the folder that we consider, this system should be used.
Once this is done, we have a part of the process finished. Although we still need to automate this process, since what we have done now is manual. But we need Windows 10 to dedicate itself to doing this automatically. So we still have a few steps to finish.
Delete old files automatically
This process is simple, so we are going to make it automatic. The first thing we have to do is create a BATCH file. So the first thing we have to do in this case is open the notepad. We look for it in the search bar, typing its name, and it will appear next.
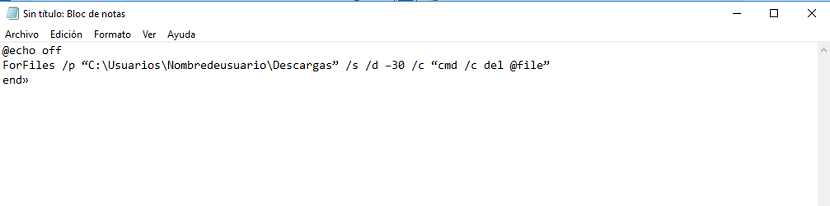
Once inside it, we have to paste the code that we created earlier and used in PowerShell. If you have modified the code to suit your preferences, then you have to paste that code into the notepad. We would have to paste this:
@ Echo off
ForFiles / p “C: \ Users \ Username \ Downloads” / s / d –30 / c “cmd / c del @file”
end »
We have to save this notepad file with extension .bat. Therefore, we give it a name and at the end of the name we write .bat. We keep it in a specific location. Then, we are going to go to the specific location by typing Windows + R and there we write «hell: startup». This location will be opened and then we have to paste the .bat file that we have created.
What the .bat file is going to do is that every time we turn on Windows 10, the code will be executed. In this way, the computer itself will be in charge of automatically deleting these files at all times after that maximum time that we have established in the code. So, it is important that we select a time that we consider appropriate. It is not going to be that Windows 10 ends up automatically deleting files that we still need to use at some point.
We hope that this tutorial has been useful to automate this process.
This is fine ... but for network routes? gives an error that UNC paths are not supported