
Despite the fact that its support has been discontinued for some time now, and that its usefulness is not very high, the truth is that you may be interested in reliving the old moments using Windows XP for some reason. And, unless you have an old computer that incorporates this operating system, the options of installing Windows XP on a current computer are practically nil, so it is probably more feasible to use a virtual machine.
That is why we are going to show you step by step how you can create a virtual machine using the free program VirtualBox, as well as to install Windows XP on it, so that you can use this version of the operating system whenever you want without leaving your own computer.
So you can create a virtual machine with Windows XP using VirtualBox
As we mentioned, the utility of this process is not very high, since in most cases it can only be used as an entertainment activity. However, in case you are interested in doing it, we will show you how you can achieve it step by step with VirtualBox.
Downloads and necessary requirements
To be able to install Windows XP in a virtual machine, you will need some prerequisites:
- VirtualBox: it is a free program created by Oracle that allows you to create virtual machines on your computer easily and without the need for advanced technical knowledge. Unless you have it on your computer, you must download and install it by following the steps in its wizard.
- Windows XP installation media: In order to install the operating system, you will need an operating system installation program file. You can use both a physical medium if you still have it (CD / USB) and any ISO file. These files can be easily found online, although if you wish you will also be able to purchase a physical medium in stores such as Amazon.
- (OPTIONAL) Virtualbox Extension Pack: if you want to obtain all the functions in your virtual machine, such as the possibility of encrypting the disk, the support for webcam or USB 3.0, you will need to download the VirtualBox Extension Pack on your computer. However, it is not a mandatory requirement in this case.
![]()
Create a virtual machine to install Windows
Once you meet all the necessary requirements, you can start creating the virtual machine to install Windows using VirtualBox. To do this, you must first open the program on your computer and then choose the "New" option that appears at the top. Doing so will open a wizard in which you will have to answer some basic questions to create the virtual machine:
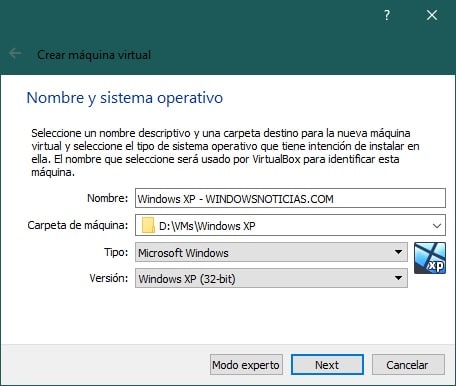
- Name and operating system: choose the name you want for the virtual machine. You can also change the location if you wish, but you must choose the operating system Windows XP along with the architecture (32 or 64 bits) of your installation media (CD or ISO file).
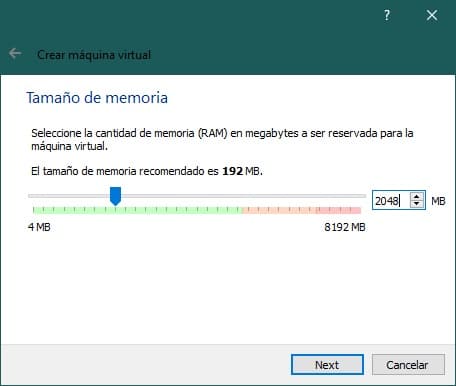
- Memory size: you must select the amount of RAM you want to allocate to the virtual machine for it to work. Being Windows XP, a large amount of RAM is not required for it to function properly. It is recommended to select at least 1 GB for it to work optimally, although you can choose less and it will still work.
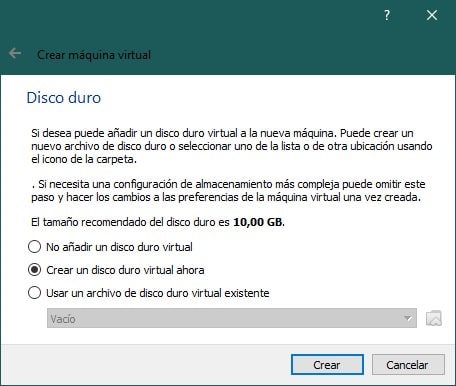
- HDD: first, you must choose the option Create a virtual hard drive now Unless you already have one. It is best that you leave the default options (VDI, Dynamically booked) and that, if you wish, you can modify the capacity of the disk or its location, since it is stored like any other system file on your computer.
Install Windows XP on the virtual machine
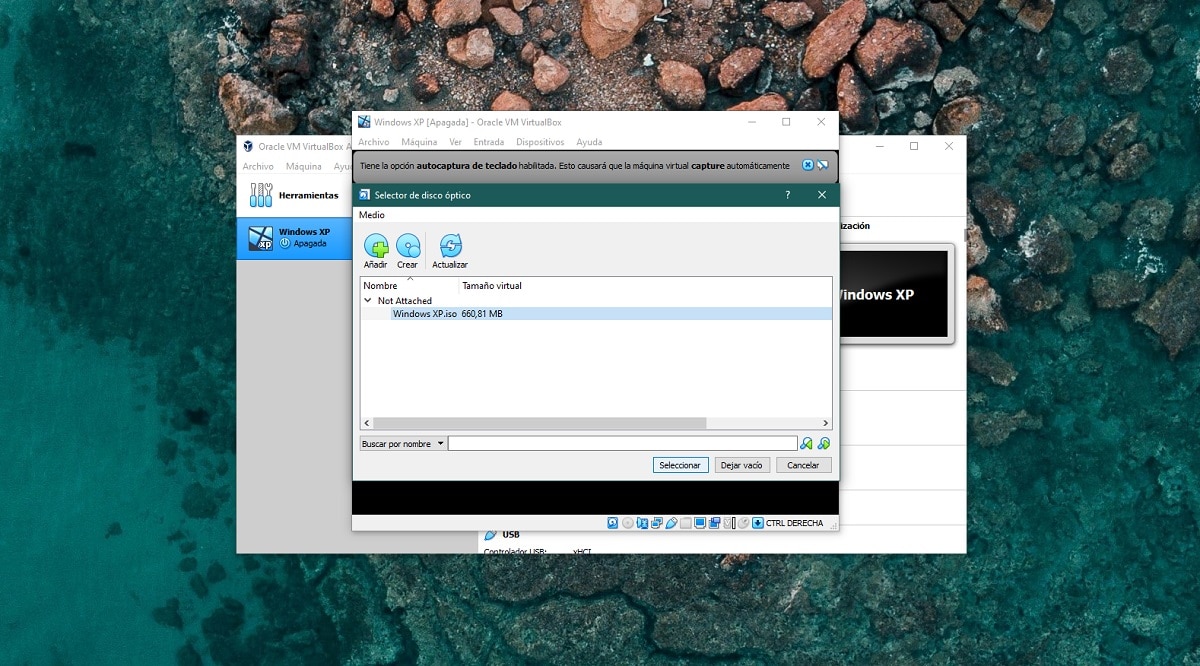
Once created, you can modify the settings you need in the configuration section, and then you can start installing Windows in it. To do this, you must first choose the "Start" option that appears at the top and wait a few moments for it to start. Doing so will bring up a window asking you where you want to boot from. Here, using the select icon, you will have to choose the location of your ISO file, or the physical drive to use.
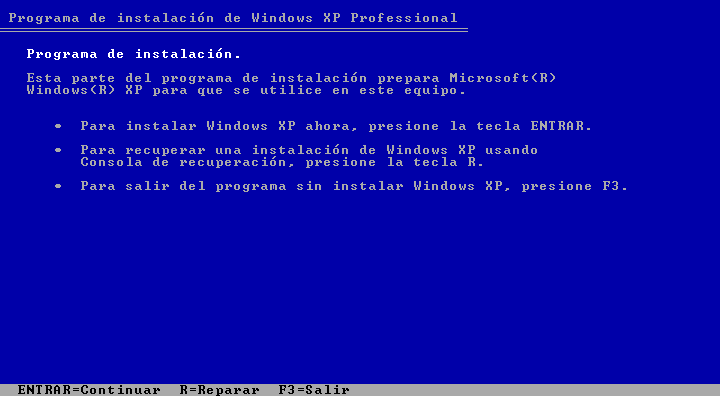
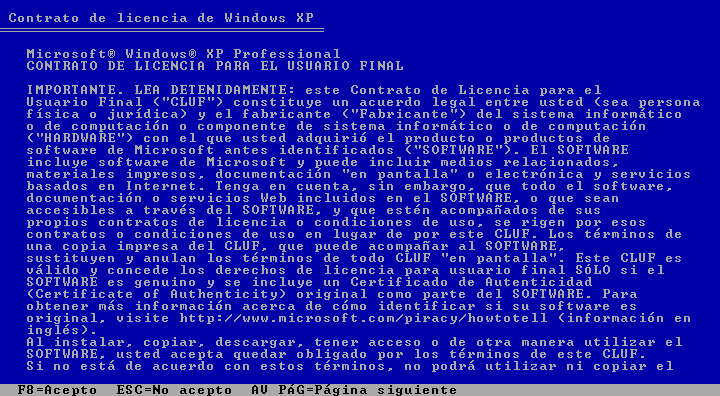
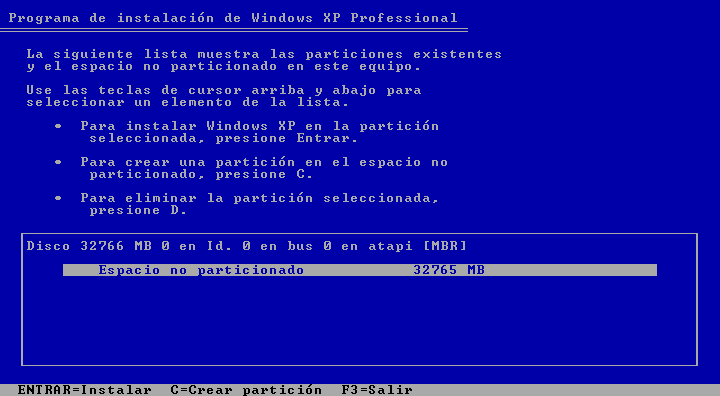
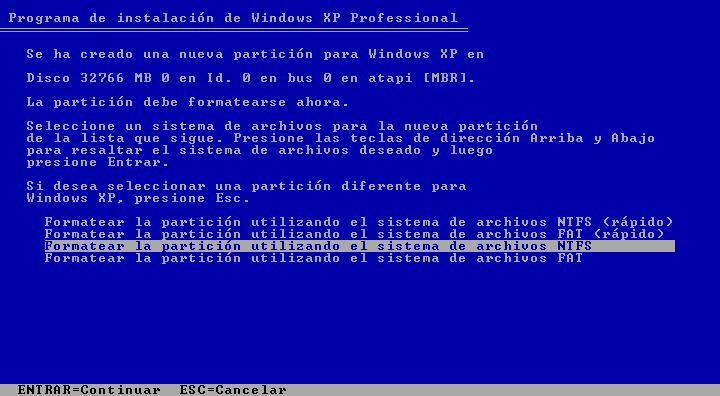
Once this is done, the Windows XP setup program will appear. The first stage of the installation does not have a graphical interface, and you will have to navigate using the keyboard of your computer according to the options shown on the screen. You will only have to follow the instructions, and you will be able to see how the program is created so that the installation can be carried out by clicking on continue, without the need for further interaction, except when choosing the partitions, where It is recommended to format following the NTFS format.
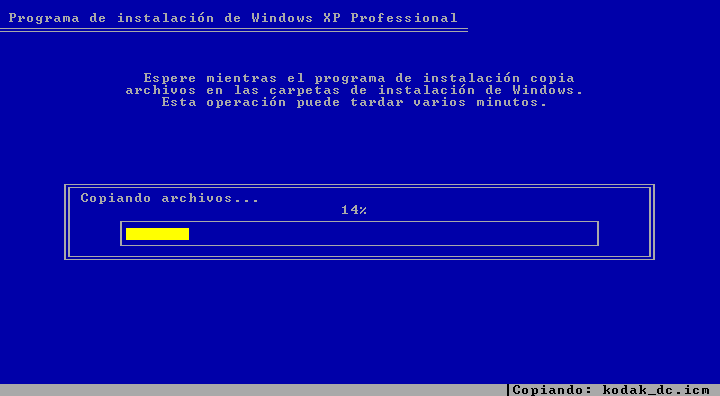
With all this done the installation program will copy a series of basic files to be able to boot, and when it asks you to restart you will see how the installation program continues with a graphical interface, being much more comfortable to use the mouse without problems.

When the virtual machine restarts, it is important that you do not press any key until the computer starts, so that you can boot from the virtual hard disk. With this done, the Windows installation will continue visually, so you can now use your mouse. It is also important that, during the installation, you memorize the key that is shown as host or host, because if you need to capture the mouse you must press it to return to your team.
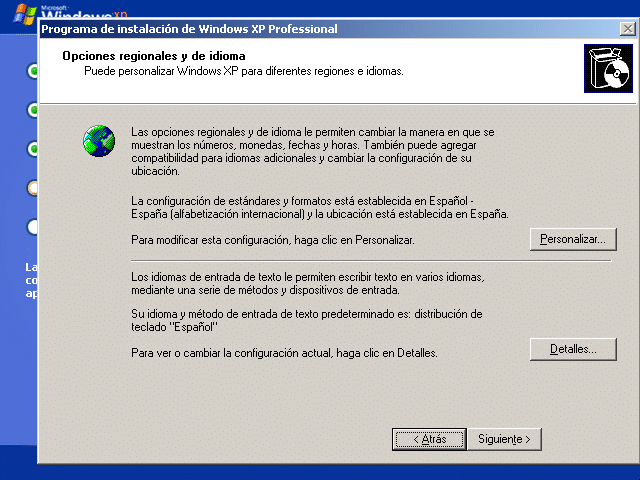
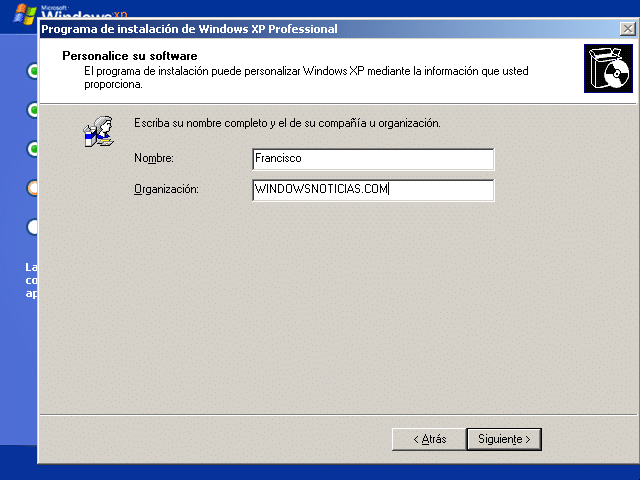
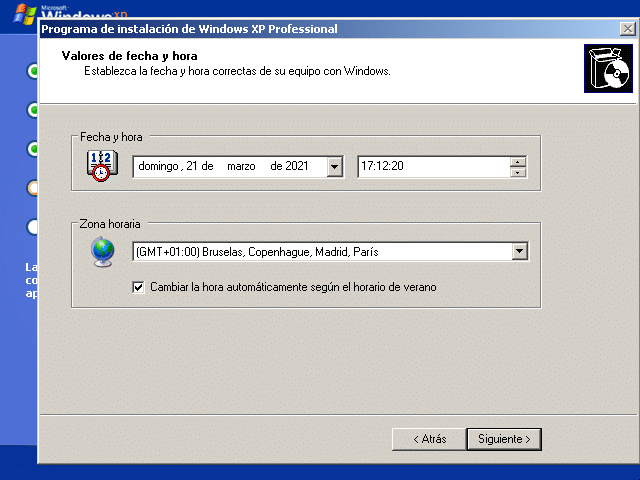
During this installation process, you should only choose some basic options such as the time or regional configuration, as well as defining the corresponding user accounts and passwords, if any.

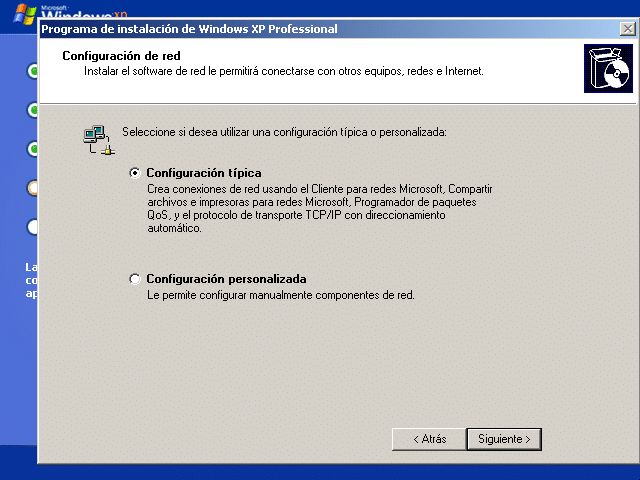
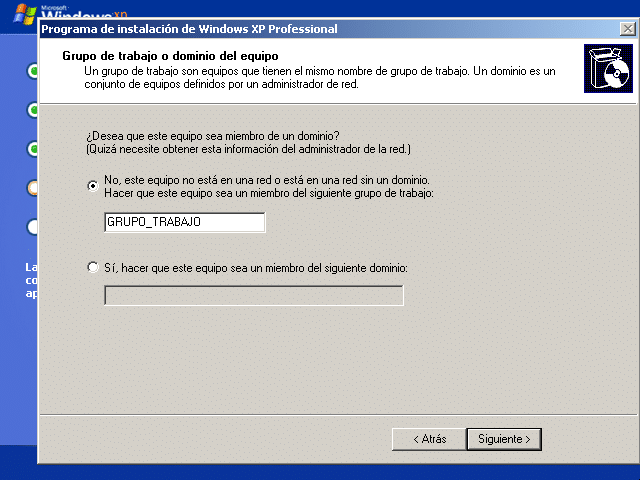
Once this process is complete, you will be able to see how after a reboot, basic Windows customization begins, where you can choose some basic configuration options (updates, username, network connection ...). After completing it, you will be able to see the Windows XP startup screen and you will be able to start using the operating system normally in the virtual machine. If you wish, once the Windows installation is complete, you can also install the Guest Additions by VirtualBox to ensure the compatibility of the operating system with the machine and install the corresponding drivers.