
Windows 11 It incorporates many new features that, in principle, significantly improve the user experience compared to the previous version of Microsoft's operating system. Many of them focus on opening more screen options, with more possibilities for display and organization. In this post we are going to address this topic, paying special attention to the forms of Split screen in Windows 11.
As in Windows 10, also in the new version we will be able to divide the screen into two, three and even four different and separate spaces. The main difference lies in the way to do it (now it is much easier) and the versatility that this new possibility offers us, since we will also be able to play with shapes and sizes.
split screen is functionality with many practical applications. Those who use it, assure that they work with greater comfort and more productivity. Let's imagine, for example, using half of the screen to work with a text document, while leaving the other half to have the browser open and perform the Internet searches we need for our task. And that's just one of many possible configurations.
As we will see below, the options for splitting the screen in Windows 11 are more varied. We can choose six different designs. In addition, we can also move the screens and change their sizes according to our own tastes and preferences.
Split screen in Windows 11
Simply by using the mouse we can divide the screen of our computer to design a work panel to suit our needs. The other way to do it (which was not possible in Windows 10) is through Snap Assist. We explain how to do it in both cases:
With the mouse
The first thing we must do is align the active window to configure the base on which to establish the division (two or four sections). This is achieved by clicking the left mouse button on the title bar of the active program. The button must be held down.
- If we want split the screen into two sections, all you have to do is drag the window to the right or left edge until you get the desired division. To help us with this, a split screen preview will appear with a gray background. When we have the desired distribution, it will simply suffice to release the mouse button.
- If we want split the screen into four sections, you have to do the same, although this time dragging the active application window to one of the corners of the screen. There will also be a preview that will help us define the new distribution.
Next, it is necessary to assign to one of the sections in which the screen has been divided as "active window". The other window(s) will then be displayed outside the main one as a thumbnail preview.
With Snap Assist
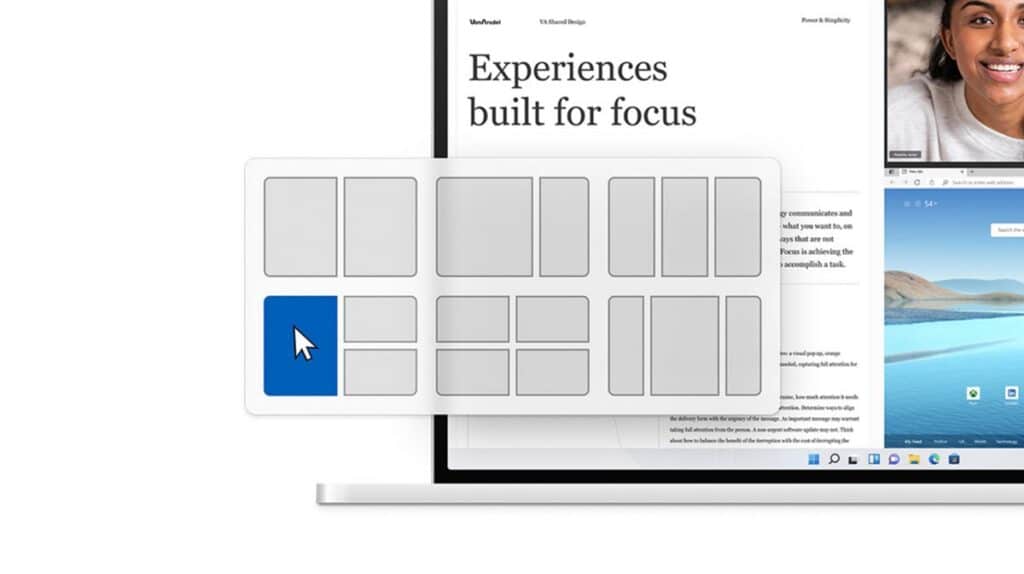
This is the great novelty that Windows 11 brings in terms of the split screen function. Through snap-assist we will be able to choose between six different split screen templates with a single click. Easier, impossible.
To use this option, we will have to make sure before that the option is activated, which we will be able to do by following these steps:
- We use the key combination Windows + i to access the setup menu.
- Then we will "System" and select the option «Multitask".
- Next, we display the menu of "Adjust windows".
- Finally, we activate the option «Show snap layouts when I move the mouse pointer over a window's maximize button».
How is it done? First of all, we move the mouse pointer over the icon «Maximize/Minimize” at the top right of the active window. When we are there, a screen will appear that shows us all the available configuration options. To select the desired option, we click with the left mouse button.
Keyboard shortcuts to split the screen in Windows 11
Many users consider that it is easier to use the keyboard than the mouse to divide the screen in Windows 11. The truth is that the keyboard shortcuts They can be very useful in this regard. These are the ones that we are going to need to reproduce the movements of dragging the screen that we have explained before:
- Left side of the screen: Windows + left arrow.
- Right side of the screen: Windows + right arrow.
- Upper left corner: Windows + left arrow and then Windows + up arrow.
- Bottom left corner: Windows + left arrow and then Windows + down arrow.
- Right upper corner: Windows + right arrow and then Windows + up arrow.
- Lower right corner: Windows + right arrow and then Windows + down arrow.
Once the initial position of the window is set as "active", the preview menu opens, where we can choose the desired option also using the arrow keys, without the need to use the mouse.