
One of the keys to the success of Microsoft Word, the main reason why it has become one of the most used text programs in the world, is its versatility. With it we can write all kinds of documents and customize them thanks to its numerous functions. In this post we are going to focus on one of them: how to make an outline in word
Inserting an outline inside a Word text can be very useful in certain kinds of documents. Whether it is a commercial, academic or professional text, diagrams help us a lot to visually understand a certain message.
A scheme is nothing more than a graphic representation of a series of ideas or concepts related to each other. It can be articulated in various ways, using elements such as text boxes, shapes, colors, lines, arrows, etc. But always respecting a distribution by levels.
Schema types
Due to its structure, the following classification of schema types can be established, although there are many more:
- Key or tree. It is the most common, widely used by students to summarize the contents of a text. It can be vertical (from top to bottom) or horizontal (from left to right). Each key opens to give rise to subordinate elements to the previous one.
- Radial. Similar to the previous one, although in this case it starts from a central path that branches out towards the ends depending on the hierarchy of each concept.
- Of numbered development. Items are displayed as a list, with an established numerical hierarchy. It is often used to create indexes for texts.
- Flowchart. Similar to the key scheme, but that incorporates arrows to interconnect the different elements. It is used, above all, to graphically explain a process or a system.
When should you insert an outline in Word?
It is not only important to know how, but when and where to do it. The answer, as is logical, will depend on the type of document, its complexity or length, the topic it deals with...
In some cases, it is preferable to insert it at first, as a table of contents or introduction; in others, instead, it will be better to put it at the end, as a summary or conclusion of what has been previously exposed. Whatever the case, it is important to know that adding a scheme in Word will always provide a plus of quality and an extra aesthetic to our document.
Create an outline in Word
It does not matter which place in the document we choose to insert the scheme, since the steps to follow will always be the same. We detail below the two most common ways to do it, each corresponding to a specific type of scheme:
Numbered development scheme

As we have seen before, it is the one that takes the form of an index in which we will be able to establish different levels and sublevels:
- First of all, we open the document in Word in which we want to add the scheme.
- We go to the exact point of the document where we want to insert it (at the beginning, at the end of the text, etc.).
- Next, in the toolbar, we click on the menu "Views" and then in "Vista".
- In the options that appear, we select the one with the "Scheme".
From this point on, the schematic will be created automatically, but this is only the first phase of the process. Now it's time to shape and customize it according to our needs and preferences.
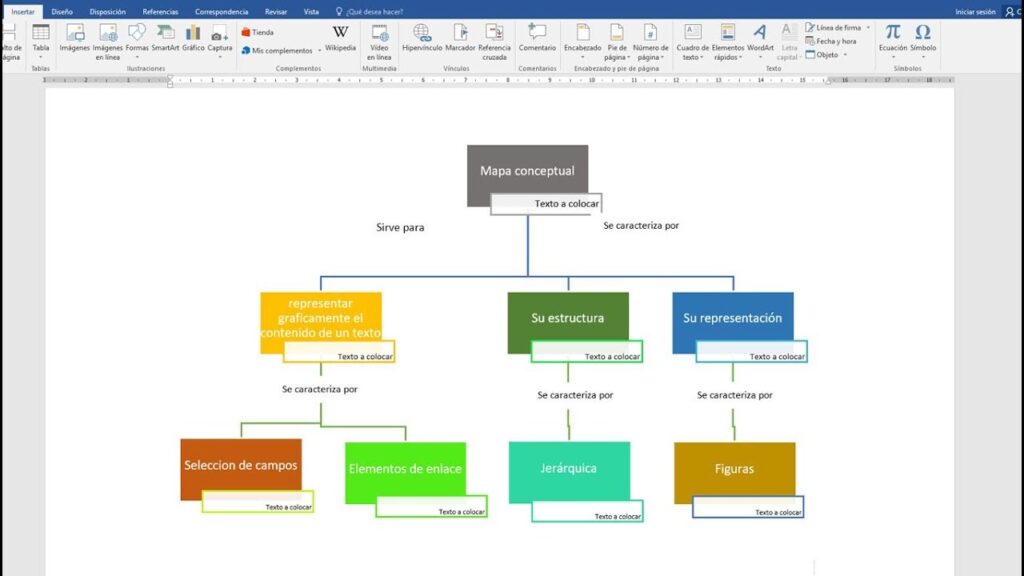
Diagram with shapes (concept map)
If we are looking for something more visual and we want to create a radial, key or even flow diagram, we have to use the option "Shapes". The process is a little longer and more laborious, although the result is also much more spectacular. This is how we should continue:
- First we open the Word document where we are going to create the scheme.
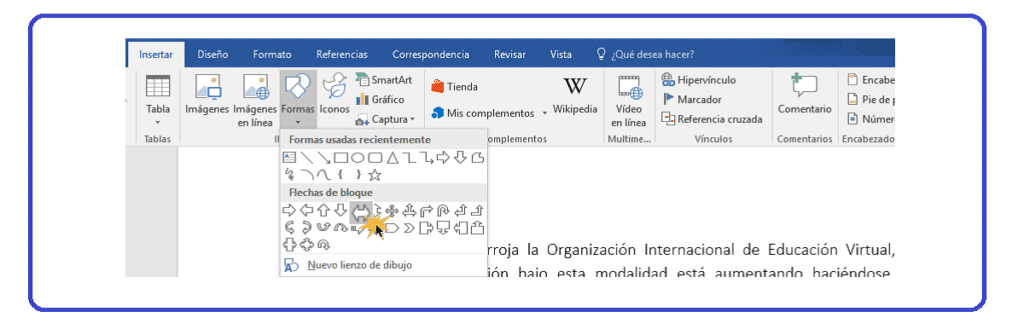
- Then we go to the section "Insert".
- In the options that appear, we choose the option "Shapes".
- In the dropdown, we select some shape (circle, oval, rectangle…).
- Then, holding down the chosen shape, we adjust its size.
- In the next step you have to choose the colors for background, outline and fill.
- Then we insert the text by right clicking with the mouse on the shape and selecting the option "Add text".
- Finally, we choose the text format: font, size, bold, italics, etc.
With this we will have created the first of the elements with which we are going to build our scheme. Later, we will place them on the Word sheet in the desired order, tars which will only remain insert keys or arrows with which we want to relate some elements to others. The way to do this is as follows:
- Again we go to the section "Insert".
- In the options that appear, we choose the option "Shapes".
- In the dropdown, we select the shapes of keys or arrows that are shown in the template.
- Then we insert the key or arrow in the corresponding place of the diagram.
- To finish, we adjust the size so that it fits well into the whole.
Outline templates in Word

Too complicated and laborious? No problem: if what we want is to save ourselves the work and time of designing a scheme in Word and, on the other hand, there is no urgent need to have a XNUMX% customized scheme, the best solution is import a default template. There are many websites on the Internet that can provide them to us. And most of them are free.
Almost all of these websites work the same way. All you have to do is select the template you want to use and click the "Download" button (making sure, of course, that you download it in Word format). Obviously, we are not going to find the same variety and quality in all those places. In order not to make a mistake in our choice and not waste time searching, we recommend using websites such as PoweredTemplate o Smile Templates. Both are highly recommended for what we are looking for.
The best of all is that almost all of these templates are editable. This means that if we do not find the schema exactly identical to the one we want to use for our document, we will have the possibility to make the changes we want.